Sunday, February 27, 2011
Blog Hop Challenge Winner
Hi Dandi Crafters. Thank you to all that participated in the Challenge.The enteries were super fun to see. Now to announce the winners:
Grand Prize 1
~ 2 Single digital stamps from my DtsArt.com web site.
~ 1 Single Spring Digital Stamp from The Stamping Boutique. Tracey has graciously agreed to let me give away a digital to one lucky participant. You can choose ONE of the following stamps: Picket Fence, Flower Cart, Rabbit in Egg-Boy, Bunny Egg.
Congratulations!
Labels:
digi stamp,
digital paper
Friday, February 25, 2011
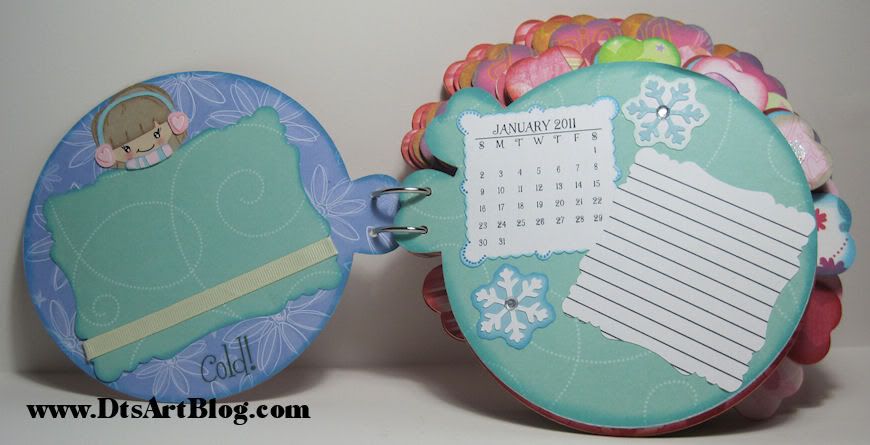
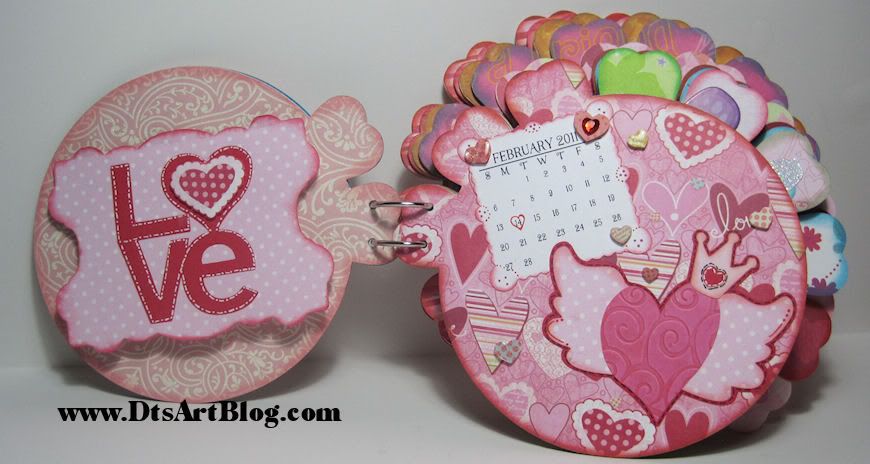
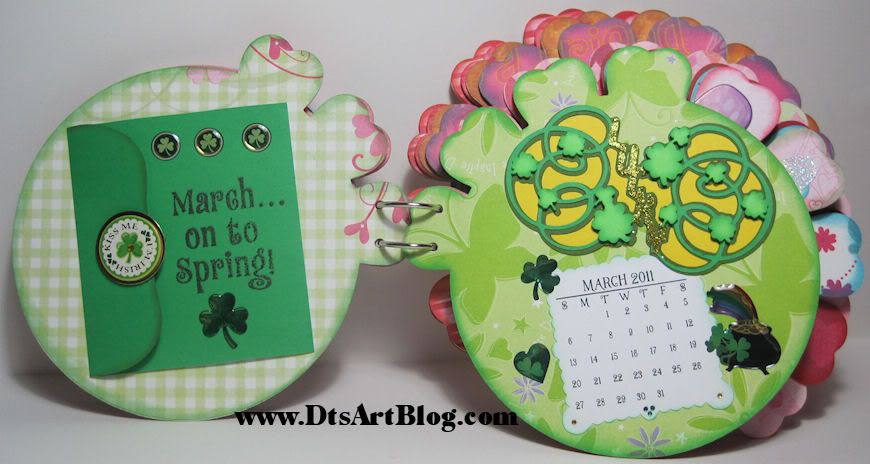
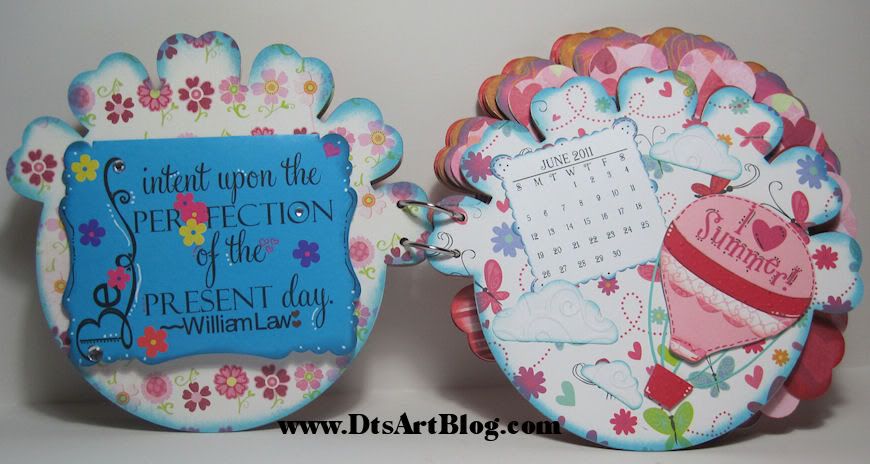
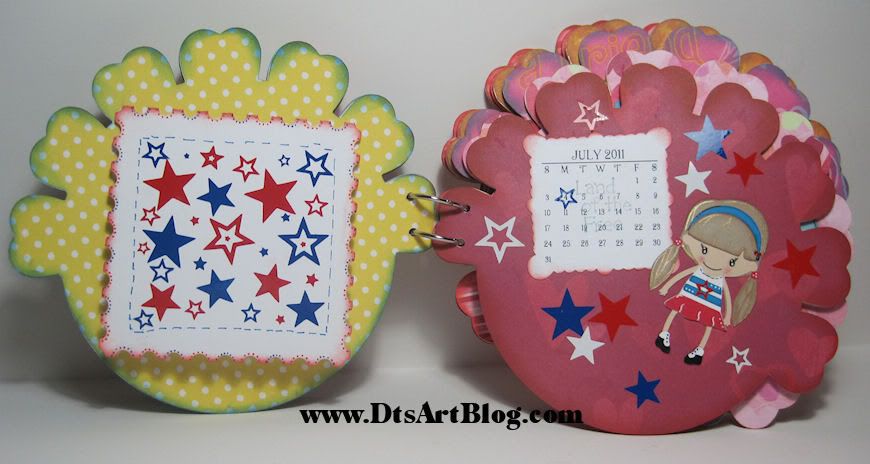
Through The Year Flower Chipboard Mini Album
Hi Dandi Crafters check out my first chipboard mini album. I hadn't ever made a mini album before. I am not a layout creating kind of gal. Actually this chip mini album is the closet I have ever gotten to a layout. Let me say never having done this before! WOW!! WOW!! It was a lot of fun, but boy is it time consuming. I don't know how many pages are in the average chipboard mini I think mine has a bit more than normal, but since the purpose of this mini album was to see the changes throughout the year I needed to do one for every month. The reason I did the album is that my daughter is really getting into scrapbooking and pictures so I thought that this would be a great way to start off. Even I can commit to 1 or 2 pictures a month. My daughter is very excited about it.
So much went into making this mini album, I used so many items it may be hard to name them all. Never having made a mini album and never paying too much attention to them I think mine is a bit different than most. It wasn't my intention to make mine different, it was just the end result.
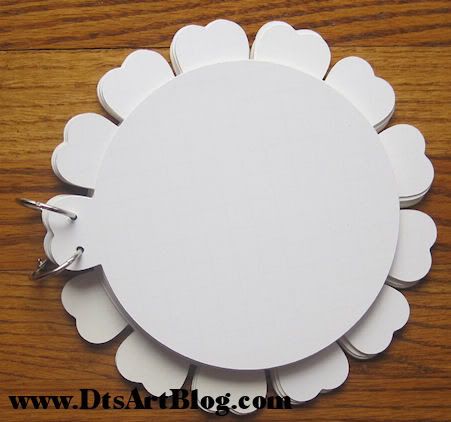
For starters, I didn't want to spend the money on chipboard, I like to use cereal boxes when possible to be environmentally friendly, for my mini album however I would have IF there was anything out there that matched the idea I had in my head. I wanted to cover the year so that meant I need at least 12 pages. I had the idea of doing a flower that grew with the year. Now there very well maybe something out there like this but as I said I have never paid attention to mini album books so if there is something out there I don't know about it. I also didn't want my mini album so mini...LOL the biggest page is just under 8 inches round, the smallest just under 7. There are 13 pages in the mini album
How I created the book.
I created the template for the flower mini chip board using my image editor. Drawing a flower with a pedals was nothing daunting for me I can draw a little bit...LOL hehehehe as my boys would say I am not without skills...LOL. Once I had the basic design figured out and the pedals placed like I wanted them, the book pedals grow by one for each month, January starts out with 1 flower pedal and by the time you get to December there are 12 pedals, I imported it into, all you hardcore loyal Cricut fans look away for a minute:hehehe, Make The Cut. I cut out each of the flower page twice in white poster board using my deep cut blade. That took sometime to cut out 26 white poster board pages. I then glued the twin of each page so I could have sturdy double thickness and it would hold up leaving me with of course 13 pages. 13 not 12 because it has a cover. When the mini scrapbook was all cut out and glued it was all worth it because it was so so cute, and the concept of the flower growing with the year was sprinkled with enough, aren't I clever and it really worked thoughts to spur me on to cut out the 26 flower pages in designer papers and glue those on. Making sure that the designer paper was flat down on my mat if I was cutting the back side of the flower pages. It was much easier to flip my paper than to mirror my image each time because each flower page did require that I open a new design because the design grows by one pedal each month. LOL I only ended up cutting the wrong page 2 times. YEA!! me!! LOL
I used the following supplies
• K&CO KP Valentine Designer Paper
• American Girl Super Pad Paper
• Anna Griffin Paper
• Hello Cupcake Doodle Bat Font
• Cricut Cartridge A Child's Year
• Cricut Cartridge Hello Kitty
• Cricut Cartridge Create A Critter
• Cricut Cartridge Stretch Your Imagination
• Cricut Cartridge Doodlecharms
• Cricut Cartridge Home Accents
• Cuttlebug Machine and Embossing Folders
• Make The Cut Software Program
• Lettering Delights Weather Girl
• Lettering Delights Calendar
• Lettering Delights Balloon Craze
• Lion 125 from vector junky
• DtsArt SVG Design Files (that would be me! LOL)
• Embellishments from the following companies
• American Girl Dimensionals
• Recollections Dimensional Stickers Irish Stickers
• EK Sticko Irish Stickers
• K&Co Handmade Sweet Friends
• AMM Occasion-alls Bauble Gums
• glitter
• vinyl
• Window Cling
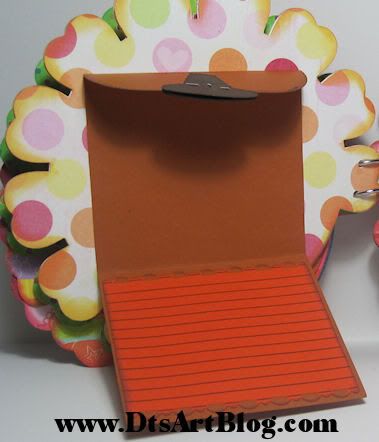
Each month has a little place for journaling and a picture or 2. Most you have to open the journaling area to see the pictures and journal area. All the month calendars are LD Calendar and I used Hello Cupcake Doodle Bats to cut out the monthly calendars.
The cover was created using LD Weather Girl and Cricut Cartridge A Child's Year for the date. I cut the date using chipboard aka around here as cereal box. LOL
In January I used LD Weather Girl, the snowflakes are also from that collection. The journaling mat and picture mat are svg's that I created with my image editor and cut out using Make The Cut.
February was perfect to use the LOVE from Cricut Cartridge Home Accent. The little scallop heart is just one of the hearts I cut out from the designer paper I used on the opposite page. Again the journaling tag card was an svg that I created. You might recognize the heart with wings from Take Out Tuesday svg file that I offered. It was a popular download. The hearts are just some stickers from one of the companies named above.
March was the hardest month for me to create I don't know why. I made the journaling svg and the Lucky Title Mat, which again you might recognize as last week's Take Out Tuesday. The rest are stickers that I purchase for this project because I was drawing a blank...Whew glad the whole project wasn't that hard. LOL
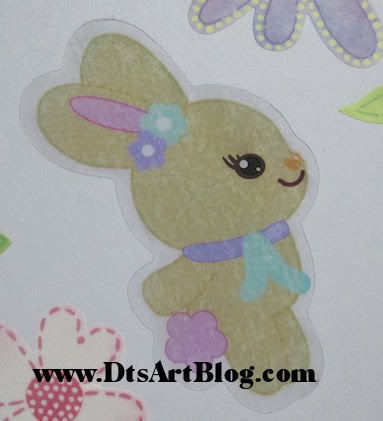
April was super easy, that one came to me quickly. I knew I wanted to use a bunny svg that I created.
I also printed the bunny out on window cling. I love to use window cling for a cute sticker effect but it seems an undiscovered treasure in the crafting community at least in the parts I hang out in. It is so fun and you get so many fun looks from it too. It's like ready to go vellum, except you don't have to worry if the glue is going to show. LOL The cloud and showers are from LD Weather Girl. The rest are stickers from one of the companies I name above.
June was just a fun month to create. I love the quote and printed out to be used as my journaling tag. It seem so carefree and summer-y to me. LOL The Hot Air Balloon is from LD Balloon Craze. The clouds are from LD Weather Girl. That collection has a lot of great svgs in it.
July I again used the LD Weather Girl set. I cut out the journaling tag from a stamp svg I made up and I just added vinyl stars all over the place. Simple and fun just like the 4th of July.
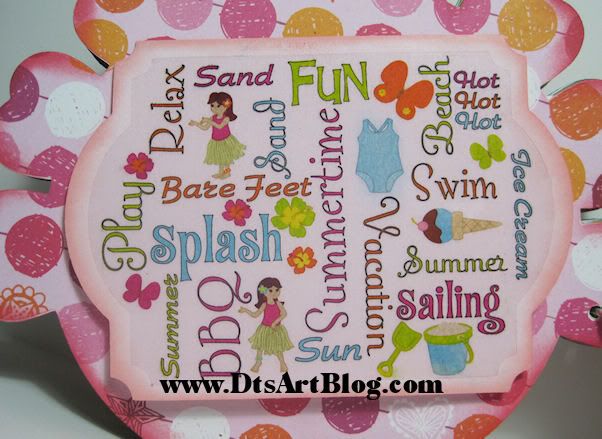
August, and sweet summer is beginning to set and our minds turn back to thoughts of school but not before we have a bit more fun. The summer title is just one I made by welding a fat font together. The ice cream cone is from Cricut Cartridge Stretched your Imagination.
The journaling tag for this month is one of my favorites out of the whole mini album. I just took a bunch of art that I had previously drawn for different projects and put them together with some summer words for fun, interesting, word art. I then printed it out again on window cling and cut it to fit my journaling tag.
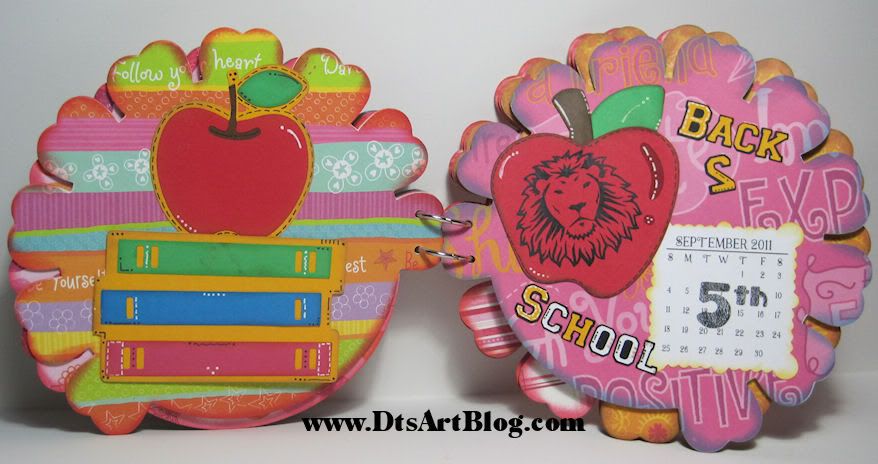
With September comes school so this page was a no brainer too. For the journaling tag I just used a card from Hello Kitty Greetings Cricut Cartridge. It was a perfect journaling tag for this month. I LOVE LOVE the apple on the Cricut Cartridge Doodlecharms so I used that on the adjecent page. Her school mascot is a lion so I used black vinyl and put a lion on the apple. It looks great! The lion came from vector junky.
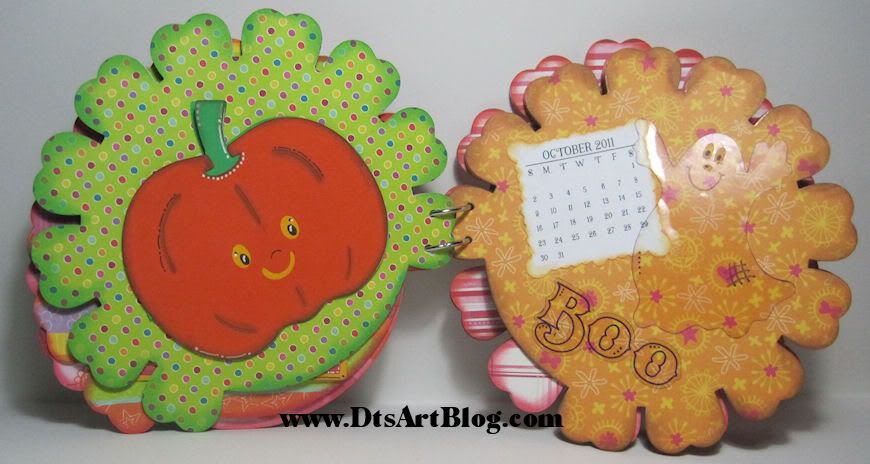
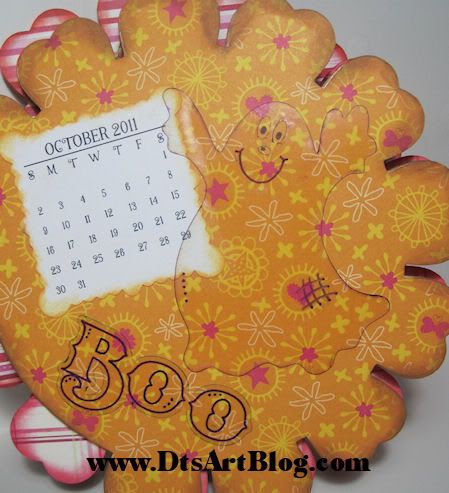
October is always a fun month. This one practically created itself. LOL I used Cricut Cartridge Create a Critter for the pumpkin card. I did a bit of editing to it to get it to look like I wanted it to look and work.
On the opposite page I used my window cling again and cut out a ghost I had created long ago and almost forgot about. Since I wanted the ghost to be a subtle I just inked the sides and drew in a few detail using a sharpie marker. He just looks super cute sitting on the page. The Boo is also window cling. Are you getting the impression you need to get some window cling? I hope so you will have tons of fun with it! I used a sharpie marker to write Boo with the Cricut. How fun is that Boo?
November was again another month that was easy for me, although I will be honest at this point what I was thankful for was that I was almost done! LOL so thankful that used a Sharpie Marker in my Cricut I wrote it out....on say it with me...Window Cling...get yourself some! I got to use that cute cute turkey from Create A Critter. He is so darn cute. The pilgrim hat is a Cricut Cartridge cut too but you will have to forgive me because at this point I don't remember which Cartridge. I probably got interrupted in the middle and had to go be Mom or Wife or some other real life happening collided with my crafting life. LOL
Ah December and here we are again at Christmas Time. Boy that came around fast. Look at that SWEET SWEET Snowman, isn't he beyond cute! It is from LD Weather Girl. That is such a great versatile svg set. You should go check it out! The snowflakes are in the LD Weather Girl set too! The sticker are listed above I am sure. I had them for forever. It was nice to get to use them. The present journaling tag is from Cricut Cartridge Hello Kitty Greetings.
Well that is it. If you are still reading this, frankly I can't believe it. This was a super long post! Well if you are still reading it, I should try to reward you for your stick to it-ness, kinda like me and this mini album...LOL
So if you are reading this tell me on this blog post what month was your favorite and why. I will give 3 loyal followers, because if you read this whole post you are loyal...LOL the svg download file so they can create their own flower mini album. MAKE SURE I HAVE SOME WAY OF CONTACTING YOU! IF NOT I WILL CHOOSE SOMEONE ELSE. This isn't just good for a through the year theme. It would be great for baby's first year, for your pregnancy, recording the first year of marriage. You can do a school career. The fact that it has 12 really opens up the possibilites of what kind of album you can create with it! I will draw 3 winners using a random number generator next Saturday March 5. Good luck!
Thank You for Appreciating My Blog
Hi Dandi Crafters I appreciate you liking my blog. Recently, Leslie from Wilson Wonders awarded me the stylish Blogger Award! Isn't that a cute blog name, Wilson Wonders. I like that name almost makes me wish my name was Wilson. LOL
Thank you so much to Leslie for giving me this blog award. It is a great feeling knowing that other's like what you are doing! I received this blog award in the recent past, about 2 weeks ago, and followed the rules for passing it along to other deserving blogs so I am going to skip passing it along this time since it was only 2 weeks ago, but wanted to say thank you for thinking of my blog and stylish in the same sentence!
Thursday, February 24, 2011
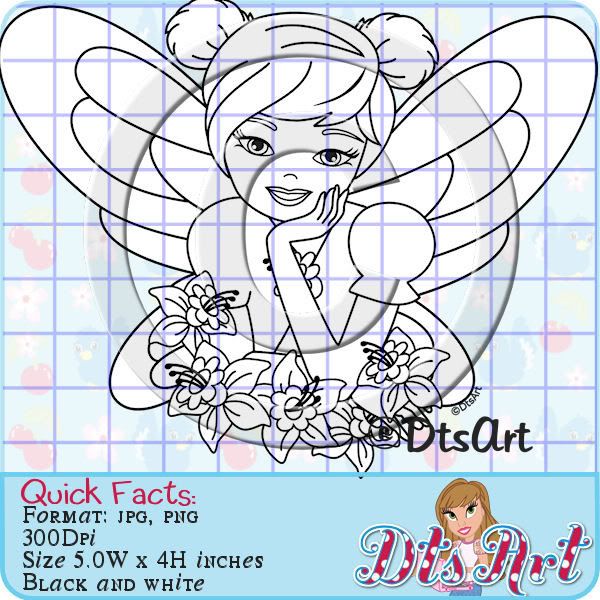
New Digital Stamps Lila May Fairy Poses Available
Hi Dandi Crafter! I have some new Lila May Fairy Digital Stamp Poses for you! Many of you have asked for more of Lila May so I have 2 new poses. Lila May Stretched Out,shown above, and Lila May Fairy Stretched Leaning on a Flower Bush. You can find both the new digital stamps along with other Lila May Fairy Poses at DtsArt.com Both are on Sale Now.
Lila May Fairy Leaning on A Flower Bush.
Tuesday, February 22, 2011
Take Out Tuesday Lucky Shamrock Title Mat SVG Download Feb 22
Hi Dandi Crafters are you feeling lucky today? Well are you follower? I hope so because today I have got a cute little lucky shamrock mat title to get you in the mood for St. Patrick's Day.
The Title Mat as you see it here is just over 4 inches wide and about 2.5 inches tall. In the folder you will find copyright, terms of use and measurements, along with SVG files, scut files, and mtc Make The Cut files.
The zip file includes:
•Lucky Shamrock Base Mat (Shown in Gold)
•Lucky Shamrock Shadow Layer (Shown in Forrest Green)
•Lucky Shamrock Cut Out Layer (Shown green)
•Lucky Welded (Shown in Glitter Gold)
•Lucky Word (Not Shown)
•Shamrocks (Shown spring green with inked edges)
I provide Tuesday Take Out as a thank you to my followers and regulars. It is available on Tuesdays and Wednesdays for download on Thursday we throw out the leftovers. If you are not already a follower you should consider becoming one so you don't miss any more Take Out Tuesdays.
Download: No longer available.
Still really want the file, read about file request.
Labels:
Make the Cut,
SCAL,
SCAL 2,
Sure Cuts Alot,
svg,
Take Out Tuesday
Saturday, February 19, 2011
A Blog Hop and a Challenge
Hi Dandi Crafters, who is ready for Spring? Who is ready for a blog hop, a challenge and some free stuff? Yea me too, so when the Design Team over the The Stamping Boutique decided to have a Spring Fever Blog Hop I was hopped right in. I also thought this would be a great time to host my first challenge too! More about that later in the post be sure to read the whole post you will be glad you did!
So to participate in the blog hop, which runs from February 19th 12AM EST until February 20th 6PM EST, you have to start at the beginning and hop to every one's blog, making sure you post on EACH blog hop post for every TSB Design Team Member to be eligible for the prize, The Stamping Boutique's 4 new spring images. They are beyond cute the design team had a chance to work with them for the blog hop. To keep us all on the Spring Fever Track the talented Amanda came up with this sketch, sweet isn't?
Here is the list of blogs you must visit, find the TBS Blog Hop Post, and comment on each of the blog hop post.
Amanda
Christy
Christy Dillman
Colleen
Collette
Crystal Dennett
DtsArt You are Here
Dawn Bennett
Heide
Jennifer
Kecia
Kendra
Louise Forsyth
Marie Bridgeman
Melissa
Michelle Single
Miranda
Pat Sergeant
Rhonda
Sara
Stacie
Suzi McKenzie
Tracey, TBS owner and designer
The Stamping Boutique Challenge Blog
Since I am so ready for spring I decided to host a challenge along with the blog hop!
Remember when you were a kid and you signed up to compete and at the end everyone who participated got a participation award. Well that is this kind of challenge! EVERYONE WINS just because they participated!
Be sure to follow the rules.
Here are the rules to be eligible for the participation award.
1. Make a New project with a spring theme for this challenge. No old projects please, post no more than 2 days from entry.
2. Add your project below.
3. After you have added your project below, email me at http://www.dtsart.com/contact.htm in the body of the message give me your name, email address, and which project you entered in the challenge. Be sure to follow the rules as I am not responsible for lost, misdirected, emails with missing or incomplete information, or undeliverable emails. Only emails sent through the link above will be eligible. You will be sent a link where you can download the digi stamp, Hello Spring. Please be sure to read and follow terms of use for the Hello Spring Digital Stamp included in the folder.
So to participate in the blog hop, which runs from February 19th 12AM EST until February 20th 6PM EST, you have to start at the beginning and hop to every one's blog, making sure you post on EACH blog hop post for every TSB Design Team Member to be eligible for the prize, The Stamping Boutique's 4 new spring images. They are beyond cute the design team had a chance to work with them for the blog hop. To keep us all on the Spring Fever Track the talented Amanda came up with this sketch, sweet isn't?
Here is the list of blogs you must visit, find the TBS Blog Hop Post, and comment on each of the blog hop post.
Amanda
Christy
Christy Dillman
Colleen
Collette
Crystal Dennett
DtsArt You are Here
Dawn Bennett
Heide
Jennifer
Kecia
Kendra
Louise Forsyth
Marie Bridgeman
Melissa
Michelle Single
Miranda
Pat Sergeant
Rhonda
Sara
Stacie
Suzi McKenzie
Tracey, TBS owner and designer
The Stamping Boutique Challenge Blog
Since I am so ready for spring I decided to host a challenge along with the blog hop!
There will be 2 Grand Prizes and A Participation Award:
The 2 Grand Prize winners will be drawn by Random.org from eligiable enteries. I will notify winners on Sunday February 27. Winners will have 48 hours to respond. If winner(s) do not respond in that time I will draw another winner by Random.org. They will have 48 hours to respond. Grand Prize 1
~ 2 Single digital stamps from my DtsArt.com web site.
Grand Prize 2
~ 1 Single Spring Digital Stamp from The Stamping Boutique. Tracey has graciously agreed to let me give away a digital to one lucky participant. You can choose ONE of the following stamps: Picket Fence, Flower Cart, Rabbit in Egg-Boy, Bunny Egg.
Participation Award
to all who are eligible.
Participation Award
to all who are eligible.
Remember when you were a kid and you signed up to compete and at the end everyone who participated got a participation award. Well that is this kind of challenge! EVERYONE WINS just because they participated!
Be sure to follow the rules.
Here are the rules to be eligible for the participation award.
1. Make a New project with a spring theme for this challenge. No old projects please, post no more than 2 days from entry.
2. Add your project below.
3. After you have added your project below, email me at http://www.dtsart.com/contact.htm in the body of the message give me your name, email address, and which project you entered in the challenge. Be sure to follow the rules as I am not responsible for lost, misdirected, emails with missing or incomplete information, or undeliverable emails. Only emails sent through the link above will be eligible. You will be sent a link where you can download the digi stamp, Hello Spring. Please be sure to read and follow terms of use for the Hello Spring Digital Stamp included in the folder.
Labels:
digi stamp,
digital stamp,
TSB
Thursday, February 17, 2011
Blog Hop this Saturday February 19
Hi Dandi Crafters! This weekend The Stamping Boutique Design Team is having a Blog Hop. It is the first time I have been on the hosting side of a blog hop, so be sure to check it out. You know I know how to celebrate on my blog so you know I will be giving something away so be sure to stop by. You will be glad that you did!
Tuesday, February 15, 2011
Take Out Tuesday Panda Boy SVG Download Feb 15
Hi Dandi Crafters! Welcome back to another Take Out Tuesday. I hope you enjoyed the 500 Follower Celebration. I certainly did! Thanks to all of you that took time to post and congratulate me. I appreciate it. Well last week during the celebration I posted a Tutu Panda Girl and told you she had a friend that I would be posting today. Well here he is Panda Boy. I hope you enjoy him. I would love to see some of your projects where you put panda boy and tutu panda girl together or maybe tutu panda girl with tutu cute monkey.
Panda Boy as it appears here is about 4.5 inches tall. In the folder you will find copyright, terms of use and measurements, along with both SVG files, scut files, and because Tutu Panda Girl came in mtc, mtc Make The Cut files.
The zip file includes:
•Panda Boy Shadow (not shown)
•Panda Boy Blackout Layer (shown in Black)
•Panda Boy Tummy(shown in white)
•Panda Boy Head (shown in white)
•Panda Boy Ears (shown in black)
•Panda Boy Eyes (shown in black)
I provide Tuesday Take Out as a thank you to my followers and regulars. It is available on Tuesdays and Wednesdays for download on Thursday we throw out the leftovers. If you are not already a follower you should consider becoming one so you don't miss any more Take Out Tuesdays.
Download: No longer available.
Still really want the file, read about file request.
Monday, February 14, 2011
Valentine's Day Target Mailbox
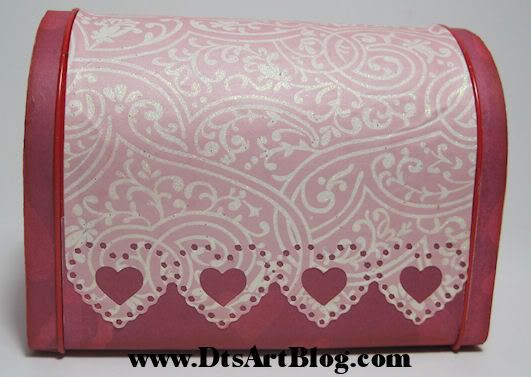
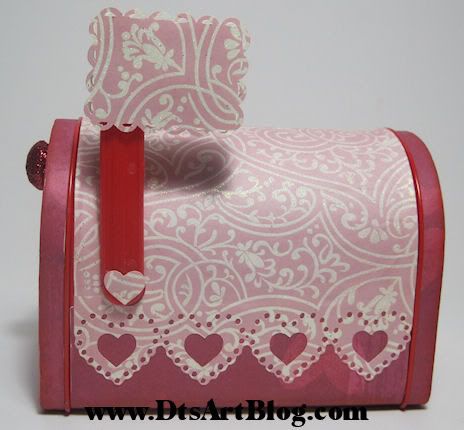
Happy Valentine's Day Dandi Crafters! I hope your day is filled with love, and chocolate, everything is better with chocolate. I am sharing the Valentine's Day Altered Mailbox my oldest son asked me to make for his girlfriend. I had altered and shared on my blog the mailbox I made a few weeks ago. It was my first time altering one. I had made a partial template to cut out with my cutting machine but didn't really make a full template.
This one of course I wanted to be cute and teenage "girly" but didn't want to spend as much time on it as the first one seemed to take me. I surfed the Internet for template. Surely someone had made an svg template. I was right I found one, however after looking it over I decided it wasn't going to meet my needs. It was a template but wasn't quite what I was looking for. So I ended up making my own. Which ended up taking MORE time than I spent on the last one, however at least I have the FULL template now that comes off the cutting mat cute as a button. All I will have to do in the future is adhere it to my mailbox!
My template looks just like you see in the picture. I didn't want to worry about whether to use 12x12 paper or 8.5x11 paper so I made sure my template design didn't rely on that. The first thing you put on is the bottom which of course covers the bottom and goes up on either side to right below where the flag base starts. The top paper is where the mailbox gets a lot of it's cute from. Those scallop hearts are NOT punches that is part of the template design. How cute and EASY!!! is that? The next thing I found is that I like the lid lips covered. I tried covering it with ribbon and I like that look a lot on others I have seen however, from my days as a bow maker, I have quality ribbon and quality ribbon tends to be wider than cheap ribbon, as in they pay attention and 3/8 inches is really 3/8 inches. LOL What you didn't know I made bows? Oh yes that was a lifetime ago. With some encouragement I will post some pictures of my bows. I sold bows for about 3-4 years on ebay/website and there was nothing like them. LOL.
Anyway back to the mail box. I created a thin strip to go around the outside of the lip of the lids. The only thing was, that unless I wanted to measure each time and I can tell you I don't, it didn't matter the size of the paper whether it was 12x12 or 8.5x11 it wasn't going TOTALLY around the lip. So you do have to cut some of the 3rd strip of paper to go on the bottom of the lid lip. I didn't think it looked bad though. Then of course I made the lid covers, for both inside and out. I used scotch quick dry adhesive glue so I could maneuver the lids to sit on their squarely. They are just big enough to cover. There is no trimming the lid covers. They fit! Hehehehe I worked on my template for a long time so next time when I alter a mailbox it is assemble and go! LOL I added a couple of cute flag covers and I was off to the races. The little heart I used to cover the ugly silver screw at the bottom is just a heart that is a by product of the scalloped hearts. It is the prefect size. The only thing that isn't part of the template is the little pull on the front. That is just a wooden knob glittered up. I think it just puts the adorable finishing touches on the mailbox.
My Valentine's Day present to you today for all my regulars and followers visiting my blog TODAY!! is this sweet file. It is available in svg, scut, and mtc format. This download isn't open to everyone just my regulars and followers that
1) visit today, post a comment
2) request the file today! (this offer has ended. Thanks to all that requested the file. All that requested the file on Valentine's Day should have received it. If you posted a comment and requested the file on Valentine's Day and didn't receive it, please contact me I will resend it.) This takes you to my contact on my dtsart website. I don't post my email on net. LOL
In your file request please give me your email address and state clearly Happy Valentine's Day Mailbox File Request in the body of your message!
The file link will be emailed to you either today or tomorrow depending on when you request the file your 9:00 o clock maybe my midnight. LOL
Happy Valentine's Day! Aren't you glad you visited today!
Labels:
Cut files,
DtsArt original,
Make the Cut,
SCAL,
SCAL 2,
Sure Cuts Alot,
svg,
Valetine's Day
Sunday, February 13, 2011
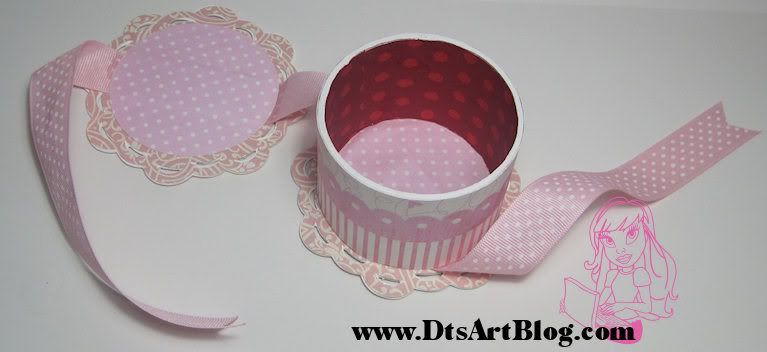
UpCycled Spool Trinket Box
Hi Dandi Crafters, I am here with another up cycled spool project for Sugar Sweet Paper Treats. February's challenge is to make a box. I have so many, many cereal boxes in my craft room that I wanted to use some of those. The next thing I have a lot of is empty spools that vinyl comes on. I cut down a vinyl spool to about 2½ inches; paper flying, glue flying, ribbon cutting, dust flying, and Voilà I have an up cycled box! LOL My daughter needed a small box to put her daily rings and necklaces in when she is sleeping, so this is my solution.
The cute little music box image is from The Stamping Boutique. It was free for signing up for their newsletter. There is a free stamp in every newsletter, so be sure to sign up for the newsletter on the blog.You don't want to miss another issue.
I just took my vinyl spool and cut it down from about 12 inches to 2½. I then I used my MTC assisted Cricut to cut out cereal boxes at 4 inches in the cute scalloped circle pattern. I covered everything inside and out with decorative paper, added some ribbon and finally the digital stamp.
Labels:
TSB,
upcyled,
Valetine's Day
Thursday, February 10, 2011
New DtsArt Fairy Digital Stamps & on Sale Now
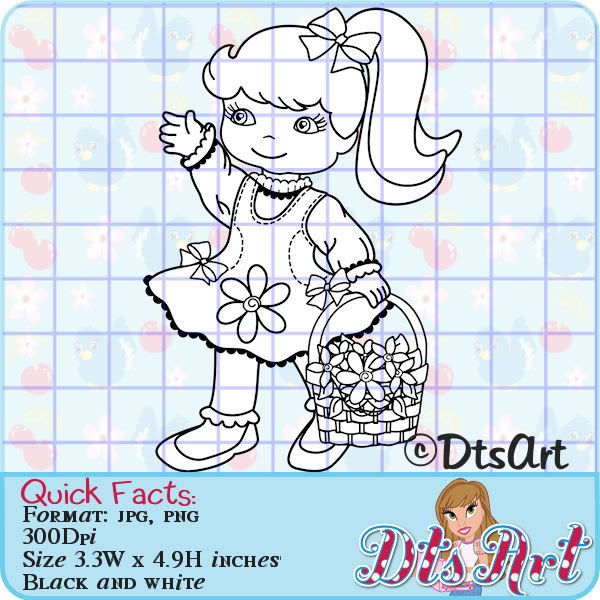
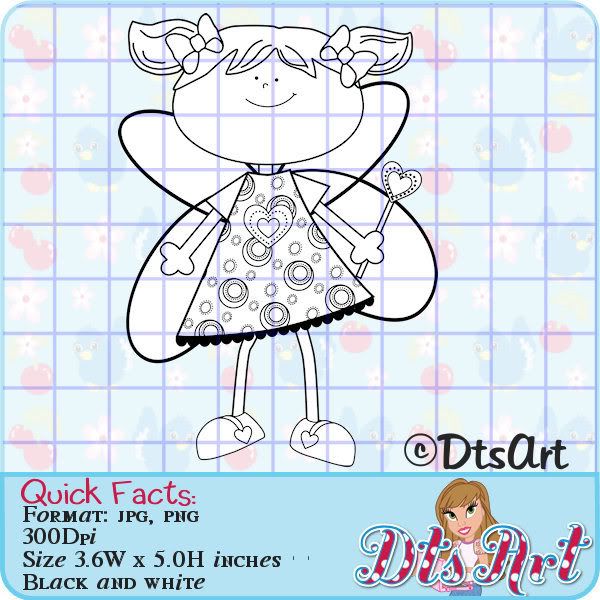
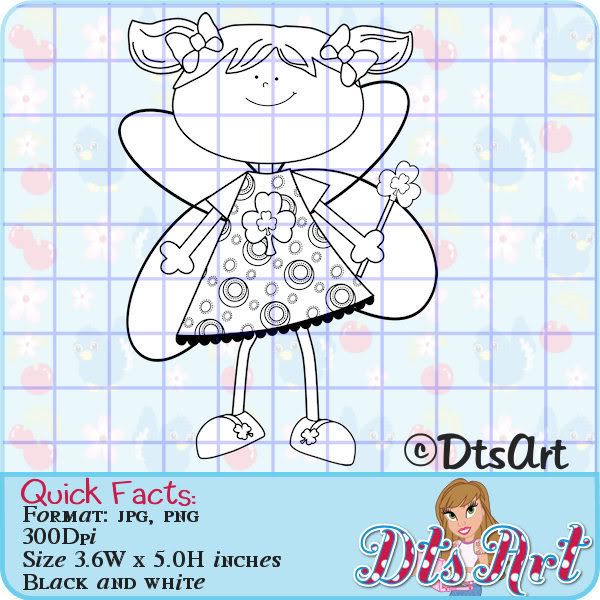
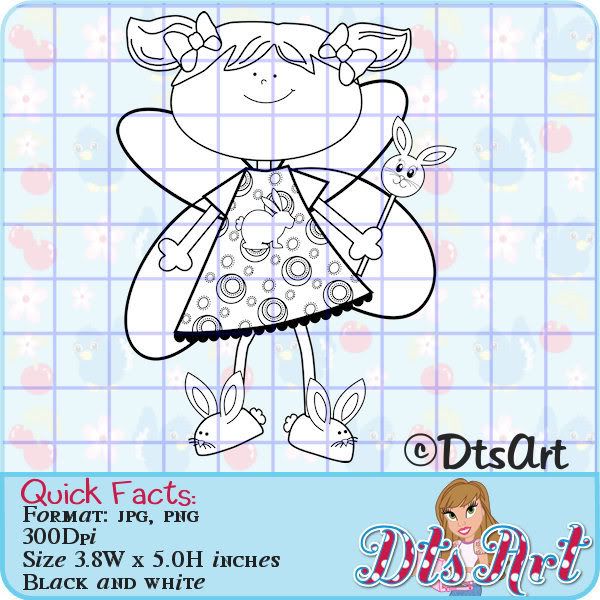
Hi Dandi Crafters! I just added some new digital stamps to my store. I have 3 new Katie Fairy from the I am only 3 collection. A Brand new Fairy Good Mommy. You can find them all on my website dtsart.com.
Katie Fairy Ready for Valentine's Day
Katie Fairy Ready for St. Patrick's Day
Katie Fairy Ready for Easter
Labels:
digi stamp,
DtsArt original character,
fairy,
Valetine's Day
Subscribe to:
Posts (Atom)