


Hi Dandi Crafters! How are all your holiday projects coming? I just finished this one and I am please with how it turned out. Aren't these Santa letters just too too cute. I made them and I was surprised how easy it was and how well they turned out considering I hadn't done this before. This wasn't from a tutorial that I read or anything. Everything is from my own trial and error experience... LOL It came from the fact that with 4 kids I have TONS of cereal boxes and I started playing one day. LOL
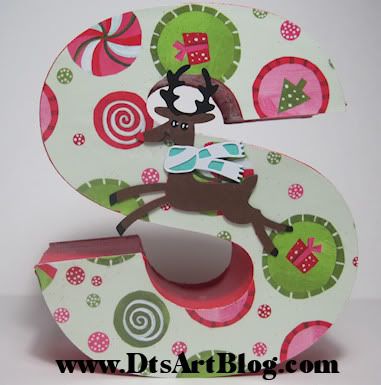
I used my SCAL enabled cricut to cut each letter out twice using a deep cut blade. I taped the cereal box down even though my mat was still very sticky. I cut each letter multiple time. I used Arial Black for the font. I cut each letter at 8.5 inches high. I then cut strips that were 1.75 inches high so that each of my letters would be 1.75 inches thick. I measured each part of each letter and cut them as wide as they needed to be, remembering because they are chip board that they do have mass so I had to allow for that thickness. The S was a little stinker to GLUE!! I will tell you that much. The straight edge letters were actually pretty easy! To glue the letters I used Judikins Diamond Glaze. As a rule of thumb I don't use this to glue things however I knew from using Judikins Diamond Glaze that it set pretty quickly although not so fast that you don't have time to work with the chip board. When it drys completely it dries glossy which really doesn't matter however it has a STRONG hold when it is totally dry!
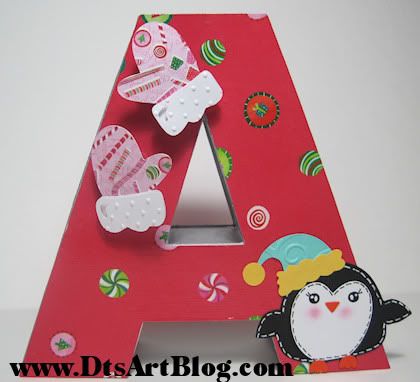

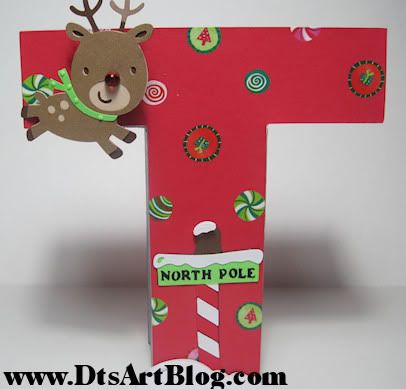
I used pop dots to give some layering depth to some of the die cuts. I also used circle punches and 28 gauge wire to make action wobbles on the fly for some spring action movement. This adds a lot of fun to my Santa letters. There you have it a pretty inexpensive way to add some holiday cheer not to mention that this project is LOADS of fun!

Challenges I entered:
Fantabulous Cricut Crawl
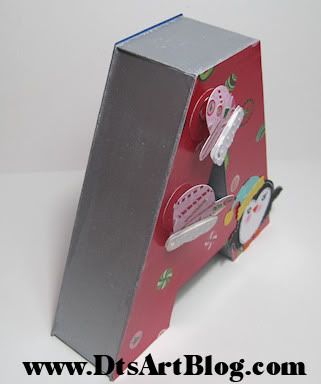
One last picture from the side so you can get an idea of the depth of the letter.
Edited to add assembly photo for those that have questions.
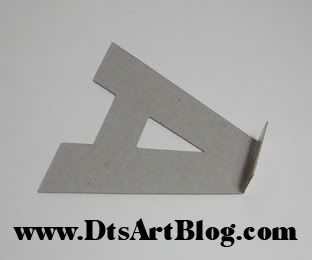
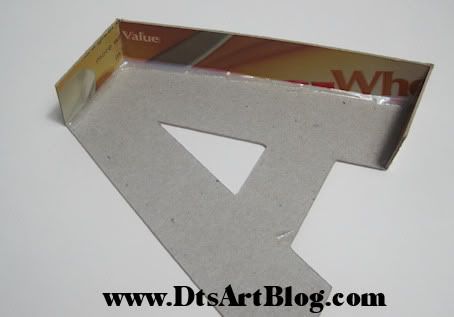
I have the letter A cut out. Those that have straight edges are easier than those letters that have curved areas.

In this first photo you can see I have my Arial Black A face cut out. I also have a couple of pieces of the sides. Notice that each of the side pieces although different lengths are the same width. This is IMPORTANT. You have to decide on how thick you want your letters to be then stick with that measurement. I made my letters 1.75 inches thick. It doesn't matter how thick you make your letters just that you pick a size and stick to it.
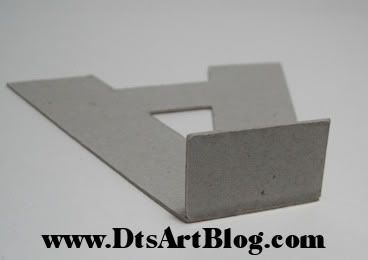
In the second step I glued the top of the A. You want all pieces on the top and bottom to be the exact measurement of the segment of the letter that you are working on. In this step I am working on the top segment. It needs to be the EXACT length of the top of the A. I cut my side pieces close to what they need to be however I like them a bit longer than they need to be because I take my scissors and very patiently cut off tiny amounts until my sides measure exactly the length of the segment of the letter I am working on.
I think I need to repeat that last part in case you just skimmed over it. The top and bottom parts of the letter, in other words the horizontal pieces of each letter need to be the exact length of the segment.
A different view of it. In the picture you should notice that the top segment that was glued was glued to the letter itself. It is not glued adjacent,next to, the face of the letter. You glue it to the back of the face of the letter so you do not change the original face dimensions of the letter. Notice that the top segment starts and tops with the top of the face of the A. It meets both open sides flush.
In the third step I added a bottom piece. Again you want this segment to line up evenly with the segment you are doing.
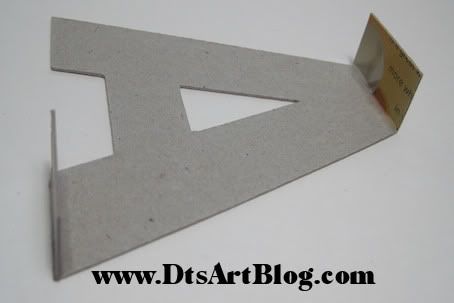
I know you are wondering why I kept going on at length why your horizontally pieces need to be exact in the length matching each segment of the sides. It is because now that we have started working on the vertical segments as shown in the next picture they are no longer going to be the exact size of the segment but rather we are going to take our scissors and patiently trim the ends of the side segment pieces to fit in between the horizontal segment that we were so careful to make exact.
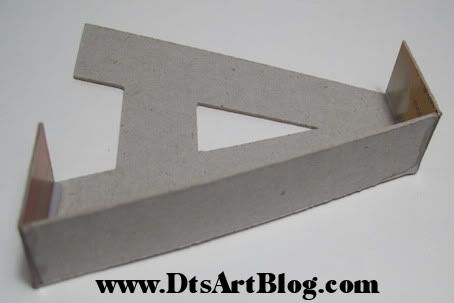
You do the same to each segment of your letter making your way around the whole letter, remembering to make sure you also do the inside middle triangle part of the A. I usually did the insides of the letters after I got a complete side finished. Here is the completed side from another angle.
As you can see by this last picture, the 3D letters stand pretty easily and sturdy even without being fully assembled. This is due to the fact that the horizontal segments are flush and even with the face of your A. All assembling sides need to be flush with the edge but not hanging over.


12 comments:
Super cute. You did a fantastic job!!
Would be great to see the letters from the sides. I'm unclear as to how you glued the sides to make it 3D. TFS!!
Thanks so much.
Judy B. I added a picture showing the side of the letters. Lay your Arial black letter face down. Take your 1.75 inch wide strip cut the top of your A to be about 2 inches long. Make sure you measure the top of YOUR A to see how long yours is. Glue the edge of the strip to the top of the A. The make your way around the sides of the A. Think of it rather like building a house of cards
I hope that helped
Thanks so much for the additional pictures! You did a great job!
I love these!! They turned out so nice. Thanks for playing along with us at FCCB this week.
wow im truly amazed at how wonderful this turned out!! it looks amazing! Thanks for playing with us at FCCB this week :)
Those are just so darling - I can't believe the work involved! Great job. Thanks for joining us at FCCB!
Love the letters and great tutorial. Thanks for sharing with us at FCCB!
WOW you did this out of cereal boxes? you are AMAZING!!! thanks for playing at FCCB
Terrific job! I love the colors and all the cut outs you did. Thanks for joining us at FCCB
Wonderful tutorial! Love all the photos! Thank you very much!
LOVE your letters! They are amazing:)
Post a Comment