Search DtsArt Blog

click to visit www.dtsart.com

Thursday, April 29, 2010

Spring Pinwheel Assembly Instructions

I recently purchased the Limited Edition Spring Collection Mother's Day 2010 Cricut Cartridge. I LOVED that it had a pinwheel. Nothing says spring fun like a pinwheel! I actually already  had a pinwheel template on my computer I just wanted the convenience that the cart offered. Although it is a cute cartridge I really haven't cut anything else from it. LOL. As I was looking around the web seeing others ideas about pinwheels I kept coming across post that said it didn't really spin. WHAT!!??!! It doesn't count as a pinwheel if it doesn't spin does it? Yea, that is what I thought too. I LOVE when you agree with me. LOL 
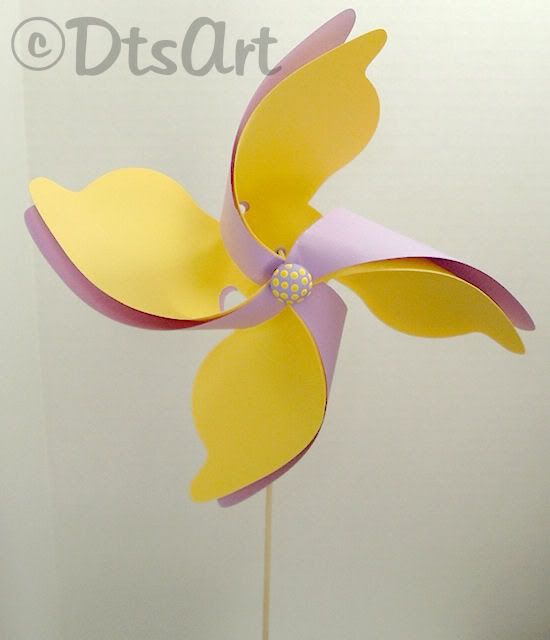
Well I got the pinwheel all assembled and it DOES SPIN! Whew what a relief. I think maybe some don't understand the assembly of the pinwheel so I thought I would post my solution. There are other assembly instructions out there this is just my way.
What you will need:
I cut the pinwheel at 7 inches
The 2010 Mother's Day Cricut Cartridge
Drill
1/16 inch drill bit
3/32 inch drill bit
CropODile or other eyelet setter.
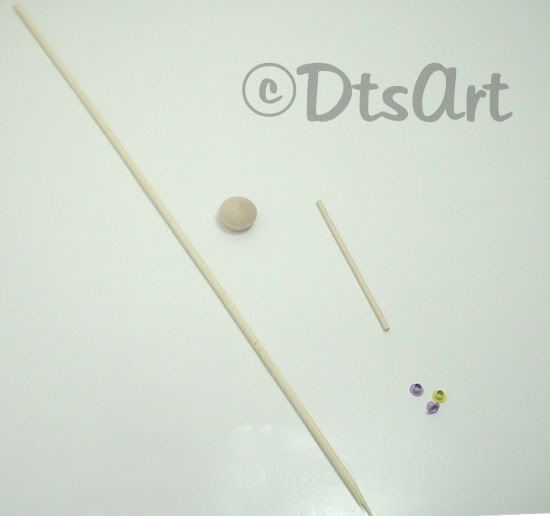
1~ Wooden Skewer (I got mine at Target 100 for dollar)
1~ 1/2 wooden button. (I got mine at AC Moore Craft Store in the doll/wood section)
1~ 3/32" x 2 5/8 Mini Dowel (I got mine at Micheal's in the wood/dowel section)
3~ 1/8 round eyelets OR
2~ 1/8 inch round eyelets & 1~ 3/16 inch round eyelet if you are going to use 2 peices of paper or card stock.
A super glue or fast drying wood glue (I used Scotch Super Glue Gel)
See picture below of the wooden peices and eyelets to get a mental picture.

1. We need to take our wooden skewer and drill a hole towards the top about 1/4 inch from the top. Right in the middle use the 1/16 drill to get it started. Take care at this time to make sure it is straight and in the middle. Once it is started you will need to change to the 3/32 inch drill bit. You want to drill well into the wood skewer but not all the way through it. Take your mini dowel and sort of test the depth. You want the dowel to sit nicely in the wood skewer. Next using the 3/32 drill bit drill a hole in the middle of the flat side of the wooden button. Again you do not want to drill it all the way through. You want to drill it to be about the same depth as you drilled the skewer.

2. Take your mini wooden dowel and fit it into the wood skewer and make sure you have a good fit. When you are sure you do place a tiny drop or two of super glue into the hole you just drilled and quickly place the mini wooden dowel in the hole and support it while the dowel sets so you get it straight. It shouldn't take long if you use super glue. Due make sure you are only using a spot of glue. If you use too much glue and it gets on the dowel in other places your pinwheel may not spin smoothly.

3. Now set the skewer with the newly glued dowel aside for a bit and work on the pinwheel. Take one of your 1/8 eyelets and set it in the middle. Make sure not to grab any of the arms yet. You just want to set the eyelet in the middle.

4. Now we want to gather all the arms and set them. If you are using 2 peices of paper or card stock you may have to punch bigger holes so the 3/16 eyelet will fit in the arms. If you are using just 1 peice of paper or card stock then you should be fine. Make sure not to set the arms with the back that we set previously. We are setting the arms together as a group all on their own. If you are using 1 peice of paper then this probably went pretty smoothly. If you used 2 peices of paper or card stock then you are probably wrestling with it a bit. I used another mini down to collect all the arms. It was sort of like wrestling an octopus. LOL

5. Now that we have the pinwheel all set with eyelets, we want to slide the pinwheel on the mini dowel. Pick up your skewer and drop  the final eyelet on the mini dowel with the wider end of the eyelet out so it will touch the pinwheel after you put it on there. Now put your pinwheel on the mini dowel with the arms facing out.

6. We are almost finished with the pinwheel. We just need to put on the front button.  You don't want to get carried away with the glue here. If you get glue on the wooden dowel where the eyelet is trying to spin it may not spin smoothly. Place a couple of drops of glue in the hole that you drilled in the back of the wooden button. Now hold the dowel straight while also holding the pinwheel away from the glue so it doesn't dry to the dowel. Again if you are using a super glue this shouldn't take long. I think I held mine my pinwheel for maybe 2 minutes just to make doublly sure  that it was fully dried.

7. Your done. If you plan to put in foam to make a pot of pinwheel then leave the skewer as is, however if you plan to give it to your little ones cut off the point so that it has a flat bottom.
If you have questions feel free to Contact Me

Playing with Gel & Sharpie Pens


So a little while ago I mentioned that I had a chance to work with Amy Chomas from Chomas Creations. Working with her really made me want those WONDERFUL WONDERFUL Gel Pen Holders and Mini Sharpie Holders she sells. I was been drooling over them the whole time I was working on her blog make over. LOL  Well I got some. I have to say that they are so much fun! I am having a blast with them.  They add so much to ones design it is amazng.  If you haven't already, head  over to  Miss Amy's Blog Chomas Creations and get yourself some. Boy I am glad I did.

Monday, April 26, 2010

Cricut Green with Envi Blog Make Over


I had the chance to work with a GREAT Cricut Enthusiast Sandy from Cricut Green with Envi with a blog makeover. Although Sandy's blog name really worked for her, to convey her enthusiasm with the Cricut her previous blog theme didn't convey her excitement. I worked with Sandy to give her a look that not only conveyed her passion for the Cricut it also got her away from the generic cricut look that many turn to identify that they are fans of the cricut. I helped Sandy find a look that not only identifies her a huge Cricut enthusiast but also help her stand out from the Cricut pack. It was super getting to know Sandy while working with her. I don't think I have worked with a more generous person. Pop over to her blog Cricut Green with Envi and have a look around. I bet some of her Cricut enthusiasm will rub off on you too. LOL

Sunday, April 18, 2010

American Girl A2 Card Box & Note Cards

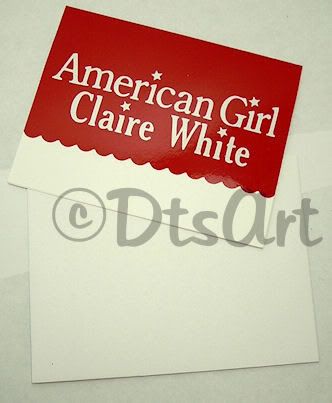
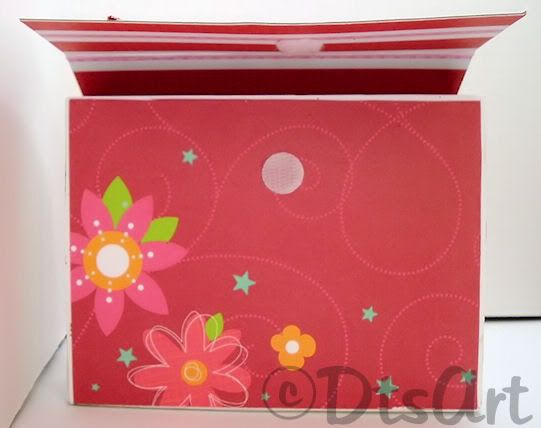
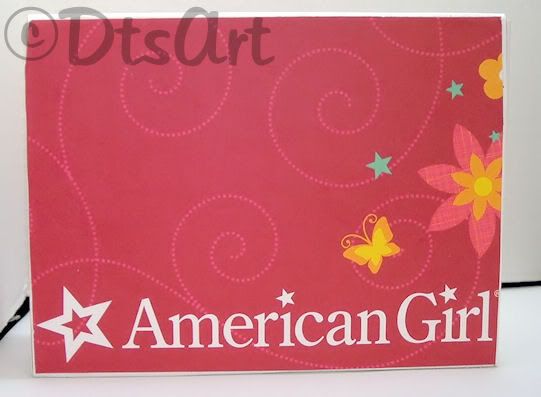
My daughter had a party to go to this weekend. It was an American Girl themed party. You know the bring your AG doll along too that are all the rage now for the 7-11 age set. Well I thought since it was an American Girl themed party, that we should give something AG themed too. So I made some Personalized AG themed note cards to go along with the gift we were giving. They are simple A2 cards purchased from the store along with some envelopes. I then added red glossy vinyl and white glossy vinyl. They look quite nice in r/l, like something you paid more for than you really did. LOL! Well I didn't want to give her just loose cards so I also made a box to put them in. I really hadn't made a box for cards before so I fumbled my way through it. It turned out actually pretty cute! LOL Although my box is way different in size and inside assembly than this one. I did get the idea from The Paper Boutique. She has a video up. You should check it out. She did a great job.
Instead of the size she used my box was only 6 ½ inches long instead of 7 ½. I only needed the inside of the box to be 1 ½ wide because it only needed to hold 8 cards and 9 envelopes so I adjusted my scoring accordingly. She also used only card stock. I wanted my box to be a bit more substantial than just a card stock so I also used thin chipboard of sorts, it was left over boxes from ice cream drum sticks(perfect thickness for my desired result. LOL), to make mine I then covered it with white card stock for the outside and on the inside I used the oh so cute K&Company Ka-Zoo card stock. Make sure if you do this to score the chipboard before you cover it, then cover one side, score again, then cover the other side and scor a third time.
Since I have a huge AG fan at my house, any craft projects we do for her friends always uses American Girl Craft 12x12 super paper pad. Both red coordinating papers are from that pad. Here is the back view. It says American Girl so there is no doubt it is American Girl, it says it right on the paper. LOL

I used a Velcro tab to keep the box closed. I also added a star and swirl both dipped in glitter to the front to give it more of the American Girl Shoot for the Stars feel. LOL! Both the Star and Swirl cut are from the Home Decor Solutions Cartridge and cut using my Cricut.


Thursday, April 8, 2010

Chomas Creattions Blog Make Over

I just finished helping Amy over at Chomas Creations with a blog make-over. She already had a terrific blog where she sell her pen holders for the cricut and her latest product, embossing kits for your cricut. I helped her update her blog with a look that she can call her own and a bit more reflective of what her site is about. Pop on over to Chomas Creations and take a look. I bet you are going to want some of those pen holders. I know I do!
Contact me if I can help you with your blog or website needs.
Related Posts with Thumbnails