Search DtsArt Blog

click to visit www.dtsart.com
Showing posts with label Digital Scrapbook Paper. Show all posts

Friday, August 26, 2011

Altered Composition Book: The look for less


Hi Dandi Crafters. My new obsession is Pinterest. If you haven't found Pinterest you totally need to check it out! It is totally addicting. I needed to make a composition book for my daughter. Well on one of my many Pinterest adventures I found this totally cute altered notebook. I am a big fan of turquoise and red. You may have guessed that if you are familiar with my past blog layout of Blue Jays and Cherries before I recently change it.
I liked pretty much everything about this altered composition book. It originally came from the Cricut Blog, so I clicked the link and read that the paper was from the manufacturer Bella Blvd. Well me being a graphics designer, I had pretty much all those patterns, hounds tooth, notebook paper, and even had a keyboard layout all on my computer from various jobs and projects, although not in those colors at all. I changed the colors to the turquoise, red, yellow theme and printed out the patterns on card stock.
I don't have either the Cricut Feeling Groovy Cartridge or Cricut Elegant Edges Cartridge. What I do have is a pre-lawsuit Cricut Expression, which means I have both SCAL and Make The Cut third party software. I ♥ Make The Cut. This is where the original composition book and my look for less composition book parted ways. Even though I don't have the Cricut Cartridges use in on the original project. I had just finished about a week or so ago making this oh so cute little loopy frame.
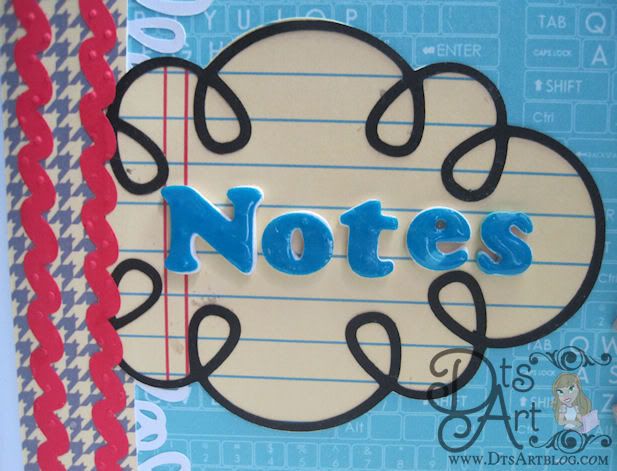
Look At it. Isn't cute? I also recently made the little loopy fringe. That came out darling too. Although I have used ribbon on altered composition books in the past I can't say I love ribbon on composition. However, I thought maybe some ricrac would be cute. I can't believe I thought that because years ago when I was hanging out in the eBay Children's Boutique World, ricrac was on everything. I grew to dislike it and thought, "If I never see another piece of ricrac it will be too soon". Guess I was wrong, who knew. LOL I played around with a my graphics program and Make the Cut and was able to come up with some ricrac that I was pleased with.
I then made some 3D letters, glossed them up and spelled out Notes. I have lots of scrabble tiles which to craft with and I thought that would be a fun finishing embellishment. PapricaK is a family joke and my daughter laughed when I showed it to her. ;-)

I had everything on hand that I needed to alter the compostion book but if I had to add up the supplies needed I would say that it would be around $3.97 that includes the big expense of paying $1.49 for 12x12 vinyl. LOL
If I had to purchase everything that was used to make the original...let's say that would have been one might expensive altered composition book. My point is use what you have. Found items usually tend to be the cutest and most interesting on altered compostion books.

I have made several altered notebooks in the past I got really tired of having to always cut and trim so I made a template in Make the Cut to cut out with my cricut. Here are the measurements if you are interested:

The main piece of the composition book if you are not trying to cover the black spine is 6.75 wide by 9.75 in height.

The corners around the opening of the composition book are rounded at 0.75 inches
If you want to cover the whole front, not really possible without wrapping around but you can cover most of it nice and tidy.
7.375 wide by 9.750 height
with the spine corners rounded at 0.200 inches

If you want to cover the spine it is
2.0500 wide by 9.750 height
Opening the composition book to the middle and laying it flat will yield you the best results. (I used white vinyl on my spine for a fun look.)

Accent piece covering the spine partially is
1.20 wide by 9.75 height

I like to use modge podge to applied to the covers to adhere my papers and or card stock. I might apply a little modge podge to the corner and edges of the main paper and or card stock but I don't coat my paper in modge podge.

All composition book measurements vary slightly from manufacturer to manufacturer but not too much. Overall these will yeild reliable results on many of the brands out there. If you are super picky you should measure yours. ;-)

Well if your still reading thanks for blogging along!

Friday, November 19, 2010

Hot Chocolate Mug Pouch For Ready Set Create E Magazine


Hi Dandi Crafters! Here's another crafty creation for Ready Set Create E Magazine. Here is a little idea I am sure you will warm up to! This cute little cocoa mug is a perfect little thinking of you treat for chilly weather. This was created for the Oct/Nov issue of Ready Set Create E Magazine.

Supplies Used:
Pattern Paper: DtsArt Paper Design.

Digital Stamp:
Designer: Prairie Fairy Designs digital stamp name Snow Friends

Cuttlebug Embossing Folders: Divine Swirl

SCAL enabled Cricut for SVG cocoa mug by DtsArt

Miscellaneous Supplies: Martha Stewart Punch.

Wednesday, November 17, 2010

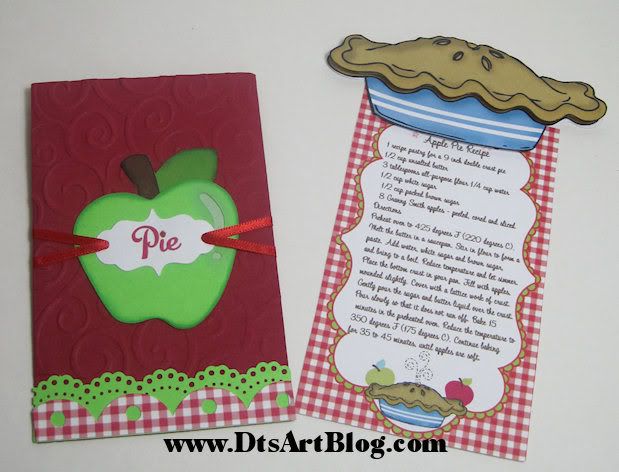
Cute Pie Recipe Card and Cover For Ready Set Create E Magazine


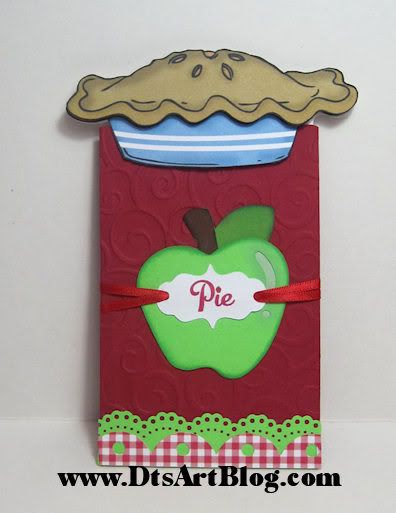
Hi Dandi Crafters! I am back with another fun creation for Ready Set Create E Magazine. With the holidays here I thought that this was a super cute idea to make use of the Pie Digital Stamp by Prairie Fairy Designs. I added the pie to the top of a cute little recipe card that I designed for this project. We all go to holiday gatherings where every year some great baker (which in my family is NOT ME! LOL) is asked repeatedly for their recipe. This is the perfect way to show it off. After I designed the recipe card, incorporating the pie digital stamp in the design, I topped it off with the cute pie stamp.

 I made a cute slip cover for the recipe card using my SCAL enabled Cricut. I used the Cricut to cut some embellishments to decorate it.Look how cute it turned out! The pie slides right over the top of the cover.

Supplies Used:

Paper: Solid Card Stock: Recollections. Recipe card design DtsArt design using Prairie Fairy Design's Pie Digital Stamp.

Cuttlebug Embossing Folders: Divine Swirl.

Cricut Cartridges: Accent Essentials: gingham scallop. Doodlecharms: Green Apple.

Digital Stamp: Designer: Prairie Fairy Designs, digital stamp name, Pie.

Miscellaneous: Martha Stewart border punch, red ribbon, SCAL for the word Pie Accent Die Cut

Tuesday, November 16, 2010

Halloween Top Note Candy Box Ready Set Create E Magazine


Hi Dandi Crafters! Here's another crafty creation for Ready Set Create E Magazine. This is a cute little witch Hershey Nugget Candy Box! This cute little candy box using top note makes such a cute little token gift. I know that Halloween has since past, however this was created for the Oct/Nov issue of Ready Set Create E Magazine.

Supplies Used:
Paper: Pattern Paper: DtsArt Digital Scrapbook Paper, Solid Card Stock: Recollections.

Cricut Cartridges: Accent Essentials, top note, Storybook, die cut and die cut accent.

Digital Stamp:
Designer: Soft Pencil, digital stamp name Little Witch.

Miscellaneous Supplies: Glitter: Martha Stewart Peridot, purple and orange grosgrain ribbon, Martha Stewart Score Board, Hershey's Nuggets, 2.5x1 inch labels.

The little nuggets covered in coordinating pattern labels is just so cute.


Friday, October 1, 2010

Design Team Member...Ready, Set, Create, E Magazine

Hi Dandi Crafters! I am very exicted to announce that I am a Design Team Member for Ready, Set, Create E Magazine. My first projects as a design team member are in the October/November issue. I am having such a blast designing for Ready,Set, Create. Pop on over today and subscribe.

Wednesday, September 22, 2010

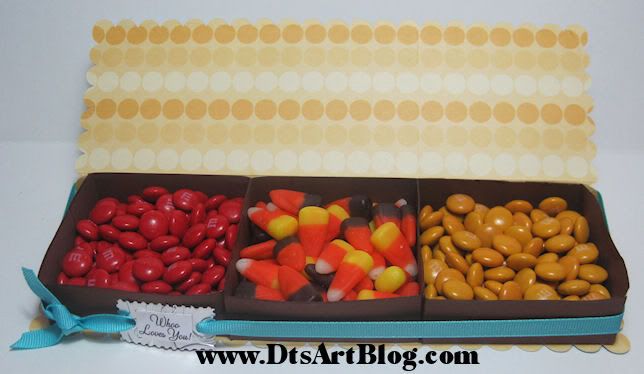
MyGrafico Challenge No # 67: Whoo Loves You With Fall Treats

Hi Dandi Crafters! You'll Fall Head Over Hills for today's challenge over at MyGrafico Challenge Blog. For today's challenge we did some paper piecing.

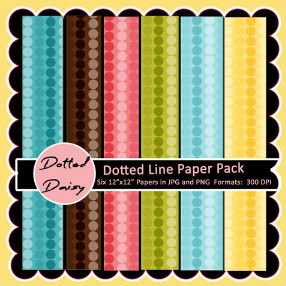
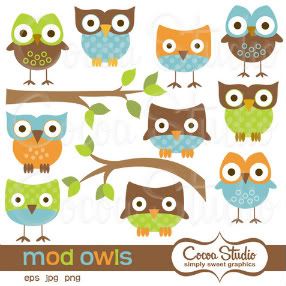
The Design Team members and I could be spotted using Dotted Line Paper by Dotted Daisy. We also worked with Mod Owls by Cocoa Studios. Be sure to check out all the designers at MyGrafico.


I saw this project over at Crafting with Class awhile ago and had been meaning to try it for sometime. I thought that this would be a PERFECT time to give it ago. It came out so cute. I really liked the aluminum foil from last week so I used it again this week for a tag and glued Whoo Love You to it. I love the color of the grosgrain ribbon. It looks really cute on the brown. I printed one owl out on white card stock and then cut it out in an scalloped oval shape using my Cricut Storybook Cartridge. I did the same with the brown scalloped oval. I used pop dots on each layer. I then cut out the top part of another owl and put it on pop dots. I cut 2 swirls from Cricut Solutions Cartridge Home Decor for fun accents. I did run my white card stock through the printer twice so I could have double sided card stock. I think the turquoise and yellow dotted line papers are a great contrast to each other.

Are you wondering what is inside? Fall Treats of course. Yum!

Be sure to check out Crafting with Class for great instructions on how to make this box!

Wednesday, September 8, 2010

MyGrafico Challenge No # 65: Beach Theme Beach Invitation

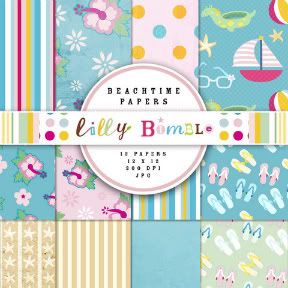
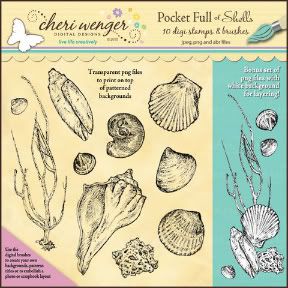
Hi Dandi Crafters. We are not quite ready to say good bye to summer just yet. We have time for one more beach bash over at the MyGrafico Challenge Blog. This week we are working with fun and sunny Beach Time Papers by Lily Bimble. We also worked with a Pocket Full of Shells that capture the imagination by Cheri Wenger. Be sure to check out all the designers at MyGrafico


This is the front of a little beach party invitation. The inside contains the party details. The card front has the beach word cut out in the blue hibiscus flower paper from Beach Time papers. I used my SCAL enabled Cricut to cut out beach on the invitation. I then cut out the word Beach in the pink hibiscus flower paper and laid them on top. I used a stamp shell from Pocket Full of Shells and repeated the pattern for a cute little frame effect. Since the card itself has a cut out I used some solid paper yellow card stock and ran it through the Cuttlebug Machine. I then added some turquoise ink to it for accent.

Wednesday, August 25, 2010

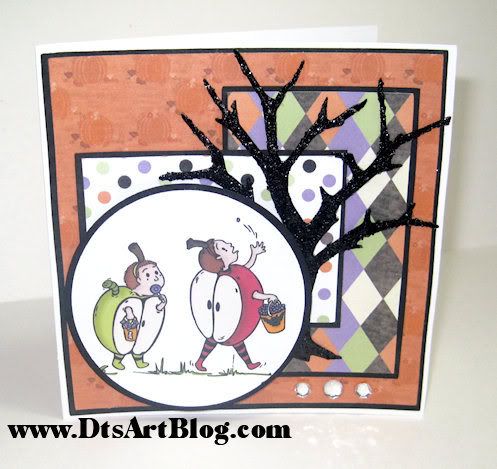
MyGrafico Challenge No # 63 : Halloween Apple Brothers Stamp :Trick or Treat Night


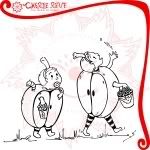
Hi Dandi Crafters! Don't get spooked but this week over at MyGrafico Challenge Blog we turn our attention to Halloween. LOL I just love this darling Halloween Apple Brothers Stamp by Cherie Reve.

You can check out the whole gallery of talented artist at MyGrafico.
The reason I loved working with this whimsical stamp so much, is that I have 3 boys close in age and when they were little I used to dress them in matching and coordinating outfits all the time. This brought back fun memories of those days.
I enjoyed making this card. I do want to say however that the card layout is scrap lifted from someone. I apologize I did not taking note of who's blog it was. If it is your card I scrap lifted email me and I will definitely give you credit for the layout. Not everything is exactly the same but enough of it that I feel I needed to give credit, just wish I remembered to who....LOL
All the pattern paper is my original designs. I have to say to those of you that buy and USE pretty pattern paper and card stock. I admire you. I only buy it. I can't bring myself to use pattern paper that I buy. I am guessing that it is because if I use it then I won't have it in the future when that perfect project comes along that I need it for....LOL Yes, yes I do know rationally that the perfect project I am saving it for will NEVER come along but scraptionally (like my word, just made it up feel free to use it. LOL. It means scrap rationality. Which we all know is something entirely different that rationality.ROTFLMBO) I can't bring myself to part with the pattern paper, to take scissors to it, to give it the honor of being placed on my Cricut mat for cutting. LOL ....Anyway back to the pattern paper. I think harlequin paper is just so fun for Halloween, don't you. Polka dot paper is great for every occasion. The orange pumpkin paper was just a no brainer for the card, although it was a multicolor paper I added an effect to make it a monochromatic. What about that spooky tree isn't it cute. It is from Cricut Cartridge Paper Doll Dress up page 52, accessories 3 with shift applied. I then added black glitter paste. Hey if I didn't add glitter paste to it how else would you know it's me...LOL I added it this time not so much to make it sparkley but to give it some spooky texture. I then added a few little rhinestones just for fun. And there you go one cute halloween card!

Thursday, August 19, 2010

Sweet Strawberry Matchbook Notebook


Hi Dandi Crafters! The other week I shared with you my cute little strawberry SVG download on Take Out Tuesday. (Did you miss it? If you did there is still a chance you can get it. Go to this post here and tell me which you would like for the 200 followers celebration.) I thought the little strawberry that I made for demonstration was so cute that I should do something with it.

School is right around the corner, and it always seems I need paper to write notes on for various reasons, taking someone's email address, phone number, or giving them mine. I always seem to be digging in my purse for paper in the hall ways of the school when dropping my kids off. LOL I decided to be proactive this time and I made myself this cute little matchbook notepad. How CUTE!! is it!!?!! I know it is too cute! It is about 4.25 inches wide and 4 inches tall. It is the perfect size for scrap paper that I always seem to be digging for.
The whole purpose of this project was to use the strawberry SVG die cut. I thought, "Hey. I will break out the strawberry paper that I designed too". Since the inside is visible I didn't want to leave it plain so I made double sided card stock by adding some polka dots in the mix.
I know there is all the excitement and the hype of the Cricut Imagine right now, and I too am excited to get one; however, hybrid print and cut projects are an option with your Cricut already if you have it enabled with a program like SCAL or Make The Cut. You just have to know that the x and y axis that the programs show you are your friend. They allow you line up your printing with your cutting.
Anyway I made up the cute little paper in paint shop pro, printed it off and cut it out. I don't have a Bind it all or Cinch. DARN IT! so I am left with the option of staples or notepad glue. I decide to go with staples this time. LOL I printed about 50 little note pad paper. I cut them out using my SCAL enabled Cricut 4 at a time. Since the point of this little matchbook notebook was to have scrapbook paper I wanted to be sure I could tear out the pages easily to be able to give them away. So I used my handy dandi little perforater by EK Success Cutterpede. I will tell you, I don't use the perforater very much at all in projects however when I need perforation there is NO REPLACING it. LOL After perforating the pages I just got my heavy duty stapler out and just stapled the pages into my little matchbook. The pages tear out, it is functional, and cute. What more could I ask for.

I finished decorating the front by glittering a smaller strawberry svg. I also used the Cricut Storybook Cartridge and cut out the word Sweet for the front finished up the look with some ribbon and a Martha Stewart Border Punch.

Wednesday, August 18, 2010

MyGrafico Challenge No # 62 Monkey Fun Stamp : Go Wild

Hi Dandi Crafters! It is Wednesday, and that means it is time to head over to MyGrafico to get ready for this weeks challenge. There is lots of inspiration this week over at the MyGrafico Challenge Blog. This week is anything goes. We are using these Monkey Fun Stamps by Primsy Doodle.

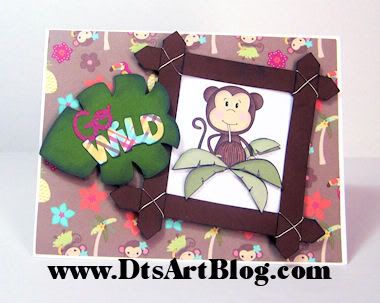
They are so cute, I knew immediately what paper I was going to use when I saw the digital stamps. I made the monkey paper and plaid paper last April and knew it would be perfect for this project. Isn't it just perfect. I didn't even have to tweak the color at all. Just Perfect! I was browsing blogs and saw a great frame made out twigs and I really liked the look so I made something similar for my monkey card. I just made some twigs using SCAL and cut out 4 of them. I added some ink to the edges and tied them up with wire, such a cute look for the monkey. I printed out an extra monkey in the trees and then cut out the leafs and put them on top of the first monkey picture using pop dots. I grabbed my trusty Create A Critter Cartridge, I KNOW I KNOW I should change my blog name to, ..."Yet Another Create A Critter.." LOL; I can't help it I LOVE the cartridge, and cut out the leaf that is on page 51 in the handbook. I thought the, "Go Wild" on page 29 was perfect too so I used that. I inked the leaf a little bit and there you go. A pretty simple card, yet it really makes a statement. I hope you enjoyed it. I know I did, but I always enjoy it when you stop by for a look-see and a chat!

Wednesday, June 2, 2010

100 Followers Celebration: Pink Flamingo Digital Scrapbook Papers

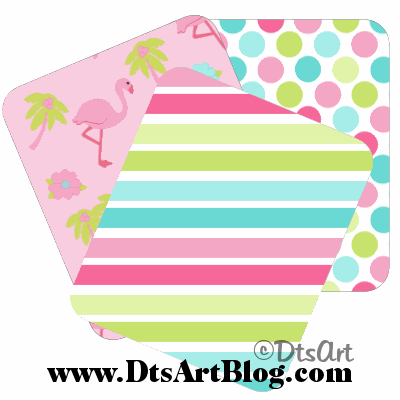
Hi all you Dandi Crafters. Thanks for meeting me back here and for following along. Well as promised I came up with a little thank you for all my follwers. When I post projects from time to time I mention that I used paper that I designed myself. I have TONS of it. So I thought you might would like some. Hey if you like it and want me to make more available for Take Out Tuesdays be sure to give a shout out and let me know. Included in the folder are 3 papers. The papers are 300dpi, which just means it is appropriate for printing. I have made them in sizes 8.5x11 inches and also 12x12 inches. Thanks for Following Along. Enjoy! Be sure to scroll down I included a few more things to download so you won't want to miss those post!
Download: DtsArt Flamingo Digital Papers

Related Posts with Thumbnails