Search DtsArt Blog

click to visit www.dtsart.com
Showing posts with label digi paper. Show all posts

Wednesday, September 21, 2011

DtsArt Digital StampsTeam Project Day

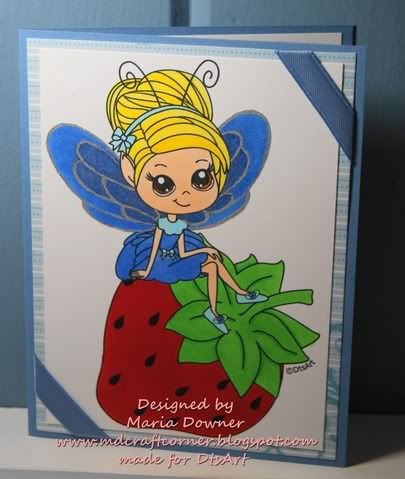
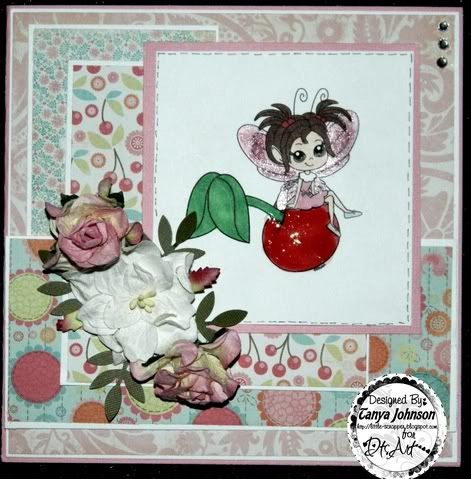
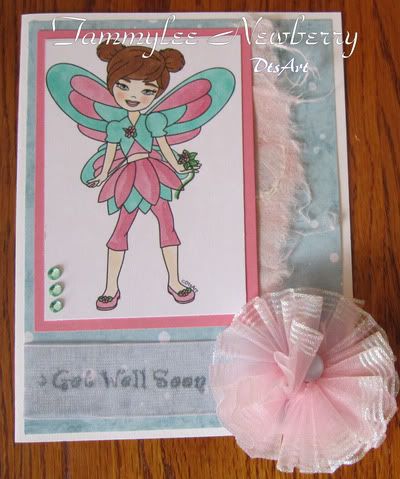
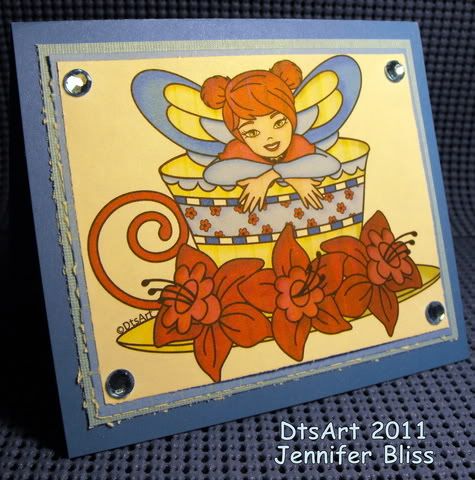
Hi Dandi Crafters. The Digital Stamp Team really brought their A game this week. We were also lucky enough to be joined this week by Maria of MD Craft Corner. Also our own design team member Kim from the svg team decided to join the digital design team this week and get in on the fun. A big thanks to Maria and Kim for joining us this week.

You can purchase the DtsArt Digital Stamps on my website DtsArt.com

The DtsArt Design Team:
Digital Stamps:
Jennifer
Shana
Tammylee
Tanya

SVG Team A
Carolyn
Lillie
Ruth
Tamie

SVG Team B
Nicole
Stacie
Christina
Kim

Take a look at exquisite cards the digital stamp team came up with.Be sure to leave some love for the Design Team and comment. On Wednesday September 28 I will randomly draw one person and they will win their choice of one of the digital stamps that the design team used here today. Please be sure to leave a way of contacting you. If no email address is available another random number will be awarded the prize.


Friday, August 26, 2011

Altered Composition Book: The look for less


Hi Dandi Crafters. My new obsession is Pinterest. If you haven't found Pinterest you totally need to check it out! It is totally addicting. I needed to make a composition book for my daughter. Well on one of my many Pinterest adventures I found this totally cute altered notebook. I am a big fan of turquoise and red. You may have guessed that if you are familiar with my past blog layout of Blue Jays and Cherries before I recently change it.
I liked pretty much everything about this altered composition book. It originally came from the Cricut Blog, so I clicked the link and read that the paper was from the manufacturer Bella Blvd. Well me being a graphics designer, I had pretty much all those patterns, hounds tooth, notebook paper, and even had a keyboard layout all on my computer from various jobs and projects, although not in those colors at all. I changed the colors to the turquoise, red, yellow theme and printed out the patterns on card stock.
I don't have either the Cricut Feeling Groovy Cartridge or Cricut Elegant Edges Cartridge. What I do have is a pre-lawsuit Cricut Expression, which means I have both SCAL and Make The Cut third party software. I ♥ Make The Cut. This is where the original composition book and my look for less composition book parted ways. Even though I don't have the Cricut Cartridges use in on the original project. I had just finished about a week or so ago making this oh so cute little loopy frame.

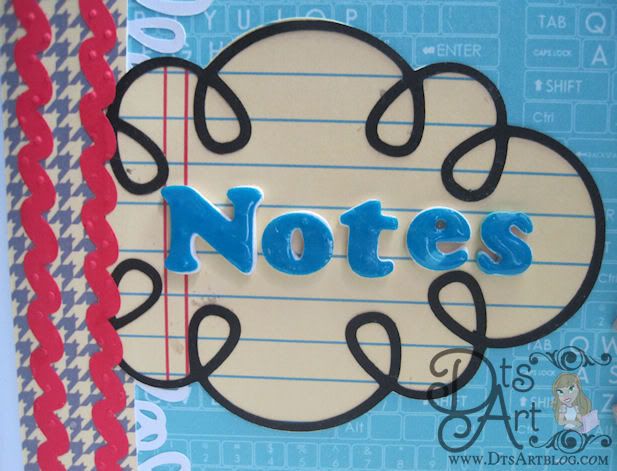
Look At it. Isn't cute? I also recently made the little loopy fringe. That came out darling too. Although I have used ribbon on altered composition books in the past I can't say I love ribbon on composition. However, I thought maybe some ricrac would be cute. I can't believe I thought that because years ago when I was hanging out in the eBay Children's Boutique World, ricrac was on everything. I grew to dislike it and thought, "If I never see another piece of ricrac it will be too soon". Guess I was wrong, who knew. LOL I played around with a my graphics program and Make the Cut and was able to come up with some ricrac that I was pleased with.
I then made some 3D letters, glossed them up and spelled out Notes. I have lots of scrabble tiles which to craft with and I thought that would be a fun finishing embellishment. PapricaK is a family joke and my daughter laughed when I showed it to her. ;-)

I had everything on hand that I needed to alter the compostion book but if I had to add up the supplies needed I would say that it would be around $3.97 that includes the big expense of paying $1.49 for 12x12 vinyl. LOL
If I had to purchase everything that was used to make the original...let's say that would have been one might expensive altered composition book. My point is use what you have. Found items usually tend to be the cutest and most interesting on altered compostion books.

I have made several altered notebooks in the past I got really tired of having to always cut and trim so I made a template in Make the Cut to cut out with my cricut. Here are the measurements if you are interested:

The main piece of the composition book if you are not trying to cover the black spine is 6.75 wide by 9.75 in height.

The corners around the opening of the composition book are rounded at 0.75 inches
If you want to cover the whole front, not really possible without wrapping around but you can cover most of it nice and tidy.
7.375 wide by 9.750 height
with the spine corners rounded at 0.200 inches

If you want to cover the spine it is
2.0500 wide by 9.750 height
Opening the composition book to the middle and laying it flat will yield you the best results. (I used white vinyl on my spine for a fun look.)

Accent piece covering the spine partially is
1.20 wide by 9.75 height

I like to use modge podge to applied to the covers to adhere my papers and or card stock. I might apply a little modge podge to the corner and edges of the main paper and or card stock but I don't coat my paper in modge podge.

All composition book measurements vary slightly from manufacturer to manufacturer but not too much. Overall these will yeild reliable results on many of the brands out there. If you are super picky you should measure yours. ;-)

Well if your still reading thanks for blogging along!

Tuesday, May 31, 2011

Take Out Tuesday Cute as a Cupcake Digital Papers Download May 31


Hi Dandi Crafter! Welcome to week 3 of a 4 week collect the pieces project and assemble. If you are following along then you know that you are collecting the pieces to make a happy birthday altered pull tab can project. If you just found my blog don't worry because every download can be used all by itself. This week's Take Out Tuesday is the SWEET Digital Papers that I used to decorate the soup can. You do have to provide the Campbell's chunky soup can yourself.
The zip file includes copyright, terms of use and 3 8.5x11 digital papers for you to print.

I provide Take Out Tuesday Freebies as a way to say thank you to my regulars that follow me. Take Out Tuesday downloads are only available on Tuesday and Wednesday. On Thursdays we throw out the left overs. If you do not follow me consider doing so, so you won't miss any more Take Out Tuesday Downloads.

Download: No Longer Available
Next Week: Custom sized cuts to Decorate the Can


Friday, November 19, 2010

Hot Chocolate Mug Pouch For Ready Set Create E Magazine


Hi Dandi Crafters! Here's another crafty creation for Ready Set Create E Magazine. Here is a little idea I am sure you will warm up to! This cute little cocoa mug is a perfect little thinking of you treat for chilly weather. This was created for the Oct/Nov issue of Ready Set Create E Magazine.

Supplies Used:
Pattern Paper: DtsArt Paper Design.

Digital Stamp:
Designer: Prairie Fairy Designs digital stamp name Snow Friends

Cuttlebug Embossing Folders: Divine Swirl

SCAL enabled Cricut for SVG cocoa mug by DtsArt

Miscellaneous Supplies: Martha Stewart Punch.

Wednesday, October 13, 2010

MyGrafico Challenge No # 70: Now And Then We Go To Disney Layout


Hi Dandi Crafters! Over at the MyGrafico Challenge Blog today's challenge is, "Anything Goes". The Design Team members and I used Clocks and Watches by Sara Paris. We also worked with Cross Hatched Paper by Woofy World. Be sure to check out all the designers at MyGrafico.


I found the theme of the digital stamps and papers really enjoyable use. Time is not a subject that I scrap about or even really think about as theme. However, it is the passing of time, to treasure a moment in time, that drives the whole scrapbooking industry.

My husband and I have gone to Disney World throughout our entire relationship. It was one of the first trips we took together as a couple when we started dating. We got married at Disney World and honeymooned there. We went to Disney when I was pregnant with every single one of my 4 kids. and took each one back before they were 1 and have taken them pretty much every year since.

Most people think of Disney World as timeless and never changing. I however think of Disney as a member of the family and see it  much as I do my children and my marriage, forever changing and growing and developing through phases. One of my favorite things to do when we go to Disney World every year is look and see how the castle has changed. I have seen the castle with a lot of different looks, sort of like my boys with their hair cuts. LOL That is why I did a layout of Cinderella's Castle as it appeared in July 2010 and in June of 2005.

Monday, October 11, 2010

New Digital Stamps on SALE NOW

Hi Dandi Crafters! Here is a look at the new digital stamps on sale now for only $1.25 each on my website. This sale won't last long. The digital download for digital stamps is not working at the moment all digital stamps will be emailed to you within 24 hours.
Puppy Love Lara cute little girl holding her pup.

Cecilia Fairy The key to my heart.

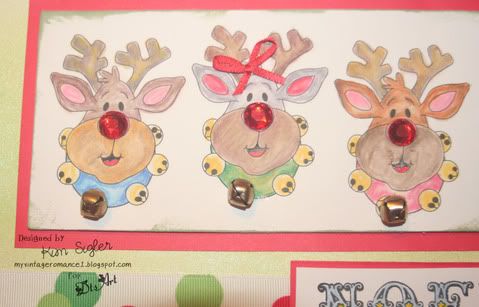
Rudolph the Red Nose Reindeer Head

Ginger Love Gingerbread girl and boy

Katie "I am only 3" Christmas Fairy Angel

Wednesday, October 6, 2010

MyGrafico Challenge No # 69: Under The Big Top


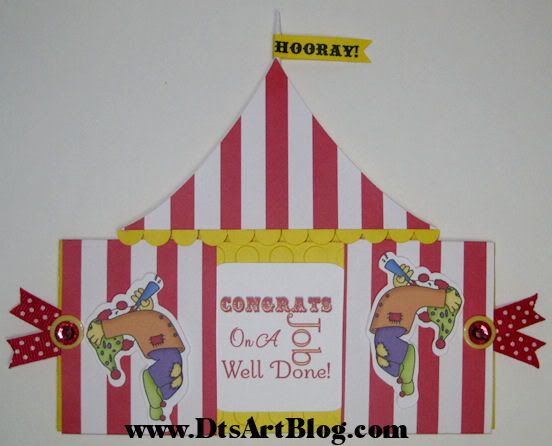
Hi Dandi Crafters! Come One, Come All, to the Greatest MyGrafico Challenge Blog. Today's challenge, "Pop It Up" add some dimension to your Card or LO or Altered item
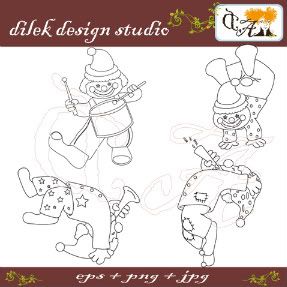
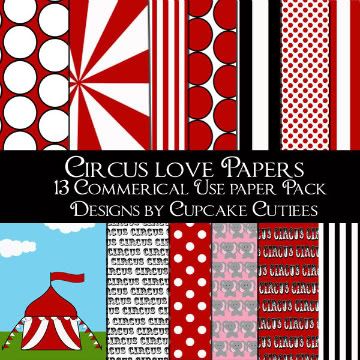
The Design Team members and I used Joyful Clowns Stamp by Delik Design Studio. We also worked with Circus Paper Pack by Cupcake Cuties. Be sure to check out all the designers at MyGrafico.


A challenge, that is putting it mildly! Clowns and Circus that is not the type of challenge that would normally gravitate to. That is exactly why I like being a design team. I can stretch and grow and be challenged out of my comfort zone! "What the heck am I going to do for this challenge, probably an uninspiring card." Those were my first thoughts. After panic past I came up with a FANTASTIC idea. I honestly don't know how I came up with this idea. LOL it is like an ace crafter possessed me for this challenge. LOL. This idea wasn't scrap lifted. I am not saying that there isn't other cards out there similar to this one, there might be. I just haven't seen them that I can recall.


I scored and folded yellow card stock to form a the base of the card and use the Seeing Spots Embossing Folder to give it some texture. I then used my SCAL enabled Cricut to cut out the tent top from the Circus Paper Pack. The tent top was created in the image editor. I also cut out a yellow tent to form the tent base of my card. I used pop dots to get the red tent raised some so the sliding doors could pass unhindered by the tent top and scalloped awning. The doors are just 2 card stock pieced folded over the yellow base card so they would slide. I used circles cut in yellow for the awning. I embellished the doors with red polka dot grosgrain ribbon, yellow buttons and red rhinestones adding more dimension. I used SCAL to cut out the Hooray pennant flag. The pole the tip of a bamboo skewer painted white. I also used scal to cut out the clowns so they would have a sticker look to them. I then used pop dots to add them to the front of the tent. I used my image editor to create the inside stamp sentiment. I don't know if this is the best card I ever made but it is certainly the best card I ever designed....LOL

Friday, October 1, 2010

Design Team Member...Ready, Set, Create, E Magazine

Hi Dandi Crafters! I am very exicted to announce that I am a Design Team Member for Ready, Set, Create E Magazine. My first projects as a design team member are in the October/November issue. I am having such a blast designing for Ready,Set, Create. Pop on over today and subscribe.

Wednesday, September 15, 2010

MyGrafico Challenge No # 66: Wild Wild West Little Buckaroo Card

Hi Dandi Crafters! Today over at the MyGrafico Challenge Blog we have wild challenge for you, Wild West Challenge that is. Today's challenge is to use some metal and our inspiration are these wild papers and stamp quotes:


The Design Team members and I used Western Bandana Papers by Cupcake Cuties. We also worked with a Wild West Stamps by Tainted Sweets. Be sure to check out all the designers at MyGrafico.

I don't have alot of metal for crafting. If I looked around I probably have more than I think I have, but when someone says, "Use metal", I don't think, "Oh I have lots of that." What I always have is aluminum foil and last time I took chemistry that was a metal...LOL Don't believe me stick it in the microwave.
Disclaimer: (Please don't really stick it in the microwave. It is dangerous. The disclaimer is there in case a moron happens by my blog. LOL hehehe) I glued some aluminum foil to card stock and cut the aluminum card stock out using my cricut. I made the sherrif's badge up on the fly, cutting it out using SCAL. The circle is just a shape that SCAL has in it. Next I ran it through the cuttlebug machine using the Perfectly Paisley embossing folder to give it some way fun texture. Wow did that liven up the aluminum card stock. I took the circle and stamped some ink on it. That was a fun effect. I then printed off some gingham card stock and ran it through the crimper. To me bandanna and gingham just go together. I have tons of gingham colors sitting on my computer. I don't buy gingham paper because gingham paper has to be the right size for each project or it looks out of place in a hurry and, two because gingham is so easy to make in whatever color you need it is really a waste of money to buy it unless of course it comes in a stack of paper. Lastly I used the cute little buckaroo stamp. Since it was a digital stamp, I dirted up the background with some grunge brushes I had. After printing it, I cut out the sentiment with the cuttlebug using the celebration stamps that came with it.

Wednesday, August 25, 2010

MyGrafico Challenge No # 63 : Halloween Apple Brothers Stamp :Trick or Treat Night


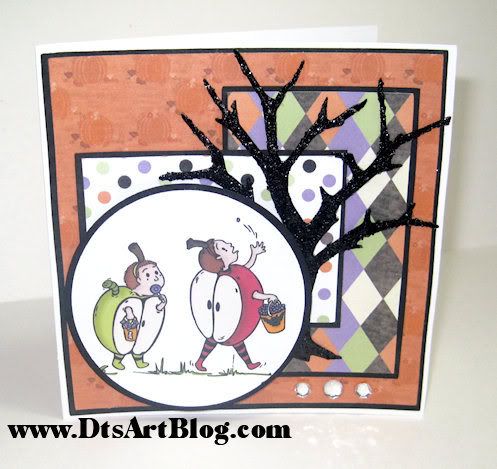
Hi Dandi Crafters! Don't get spooked but this week over at MyGrafico Challenge Blog we turn our attention to Halloween. LOL I just love this darling Halloween Apple Brothers Stamp by Cherie Reve.

You can check out the whole gallery of talented artist at MyGrafico.
The reason I loved working with this whimsical stamp so much, is that I have 3 boys close in age and when they were little I used to dress them in matching and coordinating outfits all the time. This brought back fun memories of those days.
I enjoyed making this card. I do want to say however that the card layout is scrap lifted from someone. I apologize I did not taking note of who's blog it was. If it is your card I scrap lifted email me and I will definitely give you credit for the layout. Not everything is exactly the same but enough of it that I feel I needed to give credit, just wish I remembered to who....LOL
All the pattern paper is my original designs. I have to say to those of you that buy and USE pretty pattern paper and card stock. I admire you. I only buy it. I can't bring myself to use pattern paper that I buy. I am guessing that it is because if I use it then I won't have it in the future when that perfect project comes along that I need it for....LOL Yes, yes I do know rationally that the perfect project I am saving it for will NEVER come along but scraptionally (like my word, just made it up feel free to use it. LOL. It means scrap rationality. Which we all know is something entirely different that rationality.ROTFLMBO) I can't bring myself to part with the pattern paper, to take scissors to it, to give it the honor of being placed on my Cricut mat for cutting. LOL ....Anyway back to the pattern paper. I think harlequin paper is just so fun for Halloween, don't you. Polka dot paper is great for every occasion. The orange pumpkin paper was just a no brainer for the card, although it was a multicolor paper I added an effect to make it a monochromatic. What about that spooky tree isn't it cute. It is from Cricut Cartridge Paper Doll Dress up page 52, accessories 3 with shift applied. I then added black glitter paste. Hey if I didn't add glitter paste to it how else would you know it's me...LOL I added it this time not so much to make it sparkley but to give it some spooky texture. I then added a few little rhinestones just for fun. And there you go one cute halloween card!

Thursday, August 19, 2010

Sweet Strawberry Matchbook Notebook


Hi Dandi Crafters! The other week I shared with you my cute little strawberry SVG download on Take Out Tuesday. (Did you miss it? If you did there is still a chance you can get it. Go to this post here and tell me which you would like for the 200 followers celebration.) I thought the little strawberry that I made for demonstration was so cute that I should do something with it.

School is right around the corner, and it always seems I need paper to write notes on for various reasons, taking someone's email address, phone number, or giving them mine. I always seem to be digging in my purse for paper in the hall ways of the school when dropping my kids off. LOL I decided to be proactive this time and I made myself this cute little matchbook notepad. How CUTE!! is it!!?!! I know it is too cute! It is about 4.25 inches wide and 4 inches tall. It is the perfect size for scrap paper that I always seem to be digging for.
The whole purpose of this project was to use the strawberry SVG die cut. I thought, "Hey. I will break out the strawberry paper that I designed too". Since the inside is visible I didn't want to leave it plain so I made double sided card stock by adding some polka dots in the mix.
I know there is all the excitement and the hype of the Cricut Imagine right now, and I too am excited to get one; however, hybrid print and cut projects are an option with your Cricut already if you have it enabled with a program like SCAL or Make The Cut. You just have to know that the x and y axis that the programs show you are your friend. They allow you line up your printing with your cutting.
Anyway I made up the cute little paper in paint shop pro, printed it off and cut it out. I don't have a Bind it all or Cinch. DARN IT! so I am left with the option of staples or notepad glue. I decide to go with staples this time. LOL I printed about 50 little note pad paper. I cut them out using my SCAL enabled Cricut 4 at a time. Since the point of this little matchbook notebook was to have scrapbook paper I wanted to be sure I could tear out the pages easily to be able to give them away. So I used my handy dandi little perforater by EK Success Cutterpede. I will tell you, I don't use the perforater very much at all in projects however when I need perforation there is NO REPLACING it. LOL After perforating the pages I just got my heavy duty stapler out and just stapled the pages into my little matchbook. The pages tear out, it is functional, and cute. What more could I ask for.

I finished decorating the front by glittering a smaller strawberry svg. I also used the Cricut Storybook Cartridge and cut out the word Sweet for the front finished up the look with some ribbon and a Martha Stewart Border Punch.
Related Posts with Thumbnails