Search DtsArt Blog

click to visit www.dtsart.com
Showing posts with label upcyled. Show all posts

Saturday, October 22, 2011

3D Initial Wire Photo Holder


Hi Dandi Crafters. Today I want to share with you this oh so cute little initial wire photo holder I made. It came out darling. I used my electric cutting machine and Make The Cut Software to cut out the pieces of the initials however you could cut it out with a pair of sharp scissors. I used cereal boxes  so my initial to be more earth friendly however you could use medium weight chip board. The B initial dimensions are 5½ inches wide by 6½ tall and 1¾ inches thick with the wire added the wire photo holder is 9½ inch tall.
If you would like more information on assembling the 3D letters. You can see my Santa Letters post. Where I explain the assembly :o)

Friday, August 26, 2011

Altered Composition Book: The look for less


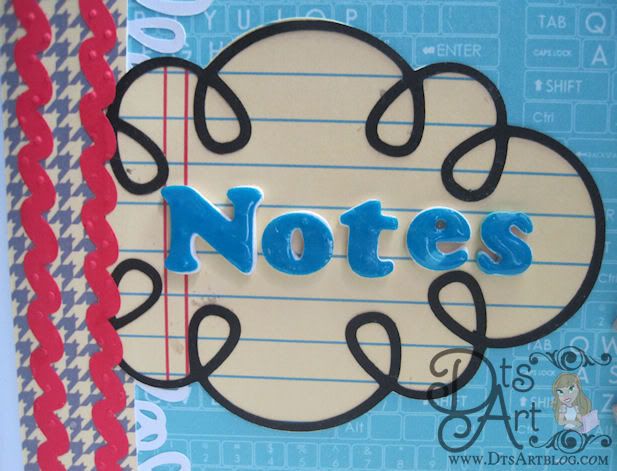
Hi Dandi Crafters. My new obsession is Pinterest. If you haven't found Pinterest you totally need to check it out! It is totally addicting. I needed to make a composition book for my daughter. Well on one of my many Pinterest adventures I found this totally cute altered notebook. I am a big fan of turquoise and red. You may have guessed that if you are familiar with my past blog layout of Blue Jays and Cherries before I recently change it.
I liked pretty much everything about this altered composition book. It originally came from the Cricut Blog, so I clicked the link and read that the paper was from the manufacturer Bella Blvd. Well me being a graphics designer, I had pretty much all those patterns, hounds tooth, notebook paper, and even had a keyboard layout all on my computer from various jobs and projects, although not in those colors at all. I changed the colors to the turquoise, red, yellow theme and printed out the patterns on card stock.
I don't have either the Cricut Feeling Groovy Cartridge or Cricut Elegant Edges Cartridge. What I do have is a pre-lawsuit Cricut Expression, which means I have both SCAL and Make The Cut third party software. I ♥ Make The Cut. This is where the original composition book and my look for less composition book parted ways. Even though I don't have the Cricut Cartridges use in on the original project. I had just finished about a week or so ago making this oh so cute little loopy frame.

Look At it. Isn't cute? I also recently made the little loopy fringe. That came out darling too. Although I have used ribbon on altered composition books in the past I can't say I love ribbon on composition. However, I thought maybe some ricrac would be cute. I can't believe I thought that because years ago when I was hanging out in the eBay Children's Boutique World, ricrac was on everything. I grew to dislike it and thought, "If I never see another piece of ricrac it will be too soon". Guess I was wrong, who knew. LOL I played around with a my graphics program and Make the Cut and was able to come up with some ricrac that I was pleased with.
I then made some 3D letters, glossed them up and spelled out Notes. I have lots of scrabble tiles which to craft with and I thought that would be a fun finishing embellishment. PapricaK is a family joke and my daughter laughed when I showed it to her. ;-)

I had everything on hand that I needed to alter the compostion book but if I had to add up the supplies needed I would say that it would be around $3.97 that includes the big expense of paying $1.49 for 12x12 vinyl. LOL
If I had to purchase everything that was used to make the original...let's say that would have been one might expensive altered composition book. My point is use what you have. Found items usually tend to be the cutest and most interesting on altered compostion books.

I have made several altered notebooks in the past I got really tired of having to always cut and trim so I made a template in Make the Cut to cut out with my cricut. Here are the measurements if you are interested:

The main piece of the composition book if you are not trying to cover the black spine is 6.75 wide by 9.75 in height.

The corners around the opening of the composition book are rounded at 0.75 inches
If you want to cover the whole front, not really possible without wrapping around but you can cover most of it nice and tidy.
7.375 wide by 9.750 height
with the spine corners rounded at 0.200 inches

If you want to cover the spine it is
2.0500 wide by 9.750 height
Opening the composition book to the middle and laying it flat will yield you the best results. (I used white vinyl on my spine for a fun look.)

Accent piece covering the spine partially is
1.20 wide by 9.75 height

I like to use modge podge to applied to the covers to adhere my papers and or card stock. I might apply a little modge podge to the corner and edges of the main paper and or card stock but I don't coat my paper in modge podge.

All composition book measurements vary slightly from manufacturer to manufacturer but not too much. Overall these will yeild reliable results on many of the brands out there. If you are super picky you should measure yours. ;-)

Well if your still reading thanks for blogging along!

Wednesday, August 24, 2011

Just Like Real ~ Play Disney Princess Checks


Hi Dandi Crafters. Awhile ago when we were discussing ideas for gift idea for the kids in our family. It came up that my niece really liked to play with her mommy's and Nana's checks. I thought it would be fun to get her some checks of her own. I looked high and low on the Internet, in stores,everywhere. There just wasn't that many out there. I tried buying them from those places that print check but turns out they will not print checks without you submitting a check from your bank account. I found a FEW check aimed at children to play with but they were beyond ugly. I needed something CUTE. After searching high and low I came to the conclusion that I would just have to make my own. I can do this right, after all I am a graphics designer. I had several images of princesses, from coloring books I had purchased over time on my many trips to Disney World. I just turned them into digital stamps and colored them. I referred to my checks for the size and then made the rest up using both real and made up information, mostly made up. LOL
When I was visiting with her the other day and she mentioned she was all out of checks and would really like some more. I had everything from the first time I made them. I just updated her info and sent some more off to her.
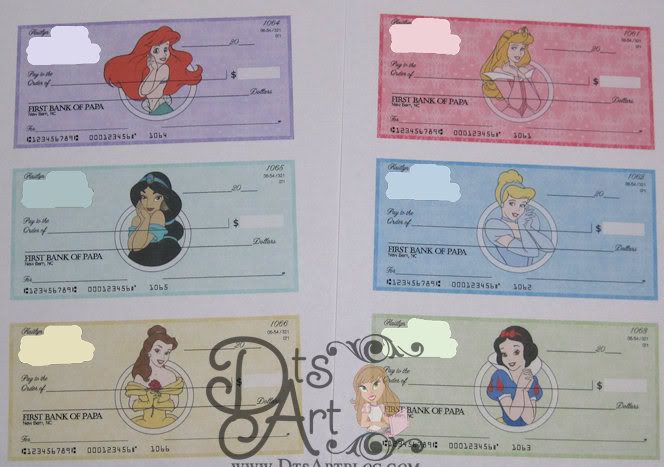
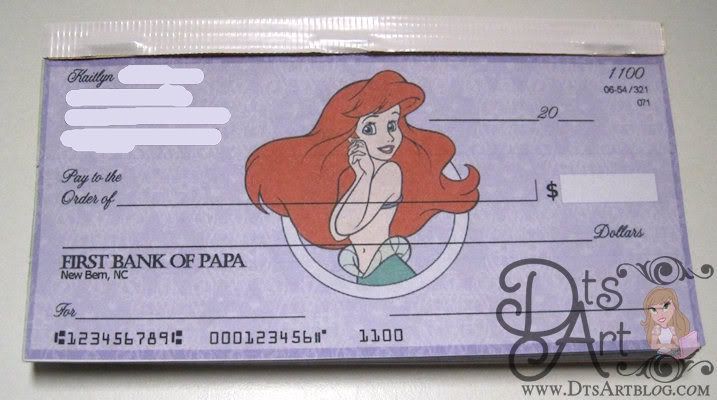
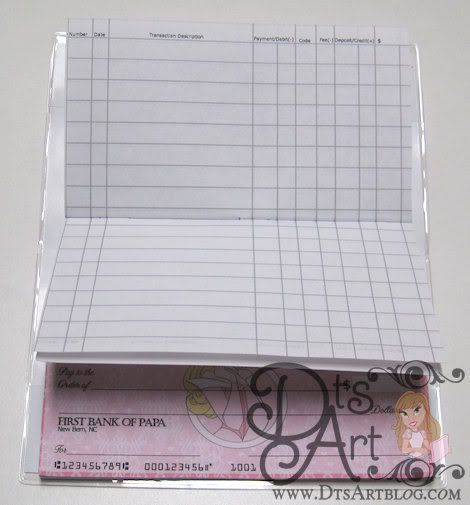
The checks are just darling in person. I even made a check book cover and check registry. I made 100 checks. I printed 3 checks per 8.5x11 sheet of paper. There are 6 different style princess checks, Aurora, Cinderella, Snow White, Ariel, Jasmine, and Belle.

 I used my cricut assisted with Make the Cut software to cut out each check. I tried having the cricut cut the perforations needed to tear the checks out however I have a cutterpede that perforates. I found that I could perforate them faster in my manual perforater and I preferred the results too. Although there was nothing wrong with the job the cricut was doing. It just took longer for the cricut to perforate each check then cut it. If it just cut each check it went fast, as did the hand perforating. I left just short of a .25 inches at the top of each check so I could staple them. I have a heavy duty stapler that will staple up to 160 pages. Each book of checks has 50 check. I used a Manila folder to cut out the backing of the check. I also used white Duck Duct Tape to cover each book of checks so they looked more finished.

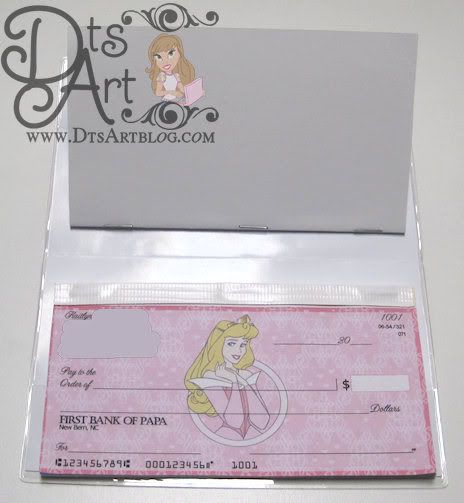
I used a plastic hand calendar cover to make the check book holder.

You know you have to keep track of the checks you write so I made a little registry for it. It was easy really just some lines on a paper.

They are beyond cute. She will be happy to get the checks in mail, but yet who isn't happy when checks come in the mail. LOL

Thursday, August 18, 2011

My New Laptop Skin & Tutorial: How to Round Corners in Make The Cut


Hi Dandi Crafters. Check out my new laptop skin. I took my laptop from fab to drab in no time. My computer is a black Acer laptop. If you are familiar with Acer Laptops then you know that the Acer name is stuck right in the middle of laptop cover. It just isn't very cute.


So I decided to dress it up a bit. I took white vinyl and covered the whole outside. I LOVE looking at a blank white canvas. My thoughts just swim in the dream of possibilities. This is what I came up with.

While I was sharing my new laptop skin on the discussion boards someone asked me how I got the rounded corners. She said she could never get hers just right. I will be honest I don't even think about how to round corners. The corners needed to be rounded so the skin would fit my laptop so I rounded them. Most of the time when I start creating I don't think of the initial basic steps. I just do them. They are just something that I have to do, have to endure, to get to the fun creative stuff. Right now this is funny to me because I am trying to learn to use illustrator better. When I am following a long in tutorials, I find myself saying wait you didn't explain how to get to that step. You assume I know more than I do. It is discouraging, because sometimes you do a tutorial just to learn the basic thing that they gloss over in the tutorial. I am sure that they gloss over it for the same reason I do. That part is just routine to them. They do it automatically and aren't even thinking about that part. It is rather like saying to someone, "Oh this is so good, here take a bite." It never occurs to you to explain how to take a bite. You just want to share the exciting, good stuff with them. Yes I know that in reality everyone knows how to bite but it does express my point perfectly. LOL
So I thought I would do a little tutorial for you on how to round corners. This is how you do it in Make The Cut. However if you ever need standard rounded corners in any program you are working in these basics will work. I know that there are LOTS of programs that will round corners for you. I have some of those programs and I let the program round the corners for me whenever possible. Make the Cut has a couple of rounded corner shapes in the shape area. However if you need rounded corners to be an exact size those shapes may not help you.
This is the basics of how to get an exact rounded corner.
These basics will work in any program. You just need to know in the program that you are using, how to draw out your basic shapes, align, cut and how to join/merge. That is it. All your basic image editors have all of these features. You just need to know where to find them in the program you are using.
1.You draw out your rectangle or square.
2.Draw out your circle in the size that you want your rounded corner to be. Rounded corners most of the time are pretty standard. You have 1/4, 1/2, 3/4, and 1 inch. You can certainly make your rounded corners to be any size you want. You can make them 0.3567 if you like. If you are trying to have rounded corners that you are trying to match, rounded corners tend to be pretty standard in manufacturing. Say you want a 1/2 inch. That was what my corners on my laptop cover are rounded at. You just make a 1/2 inch circle. LOL you want a 1/2 inch circle not half of a circle. LOL ;-)
3. Make sure you copy and or duplicate your 1/2 inch circle so you have a total of 4 circles, one for each corner.
4. Move the circles to each corner of your rectangle
5. You will want to align the circles to your rectangle so they match perfectly. Align:
a. first circle to the top left of your rectangle
b. second circle to the top right of your rectangle
c. third circle to the bottom left of your rectangle
d. fourth circle to the bottom right of your rectangle.
6. Now that the circles are aligned you will notice that there is a corner tab part of the rectangle sticking out behind every circle in the corner. You want to cut off the tab in each corner.
7. You need to notice that there is a place in each corner where the circle and rectangle line up perfectly on either side of the circle. This is PRECISELY where you want to cut. Cutting the rectangle too high or too low will give you a bump or two in your rounded corners. YUCK!! who wants THAT!!
8. Now that you have cut the corner tags off you should see that you are just steps away from having uniformed and exact measured corners. Now all that is left is to join/ merge the circles with the rectangle.
9. There your done. You have prefect rounded corners on your rectangle or square.
Hope this helped you some!


Sunday, February 13, 2011

UpCycled Spool Trinket Box

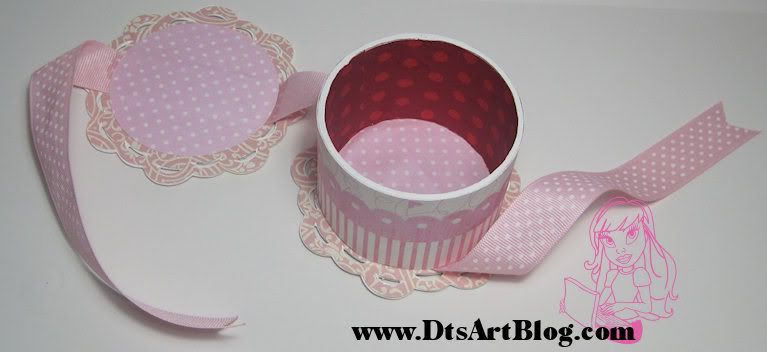
Hi Dandi Crafters, I am here with another up cycled spool project for Sugar Sweet Paper Treats. February's challenge is to make a box. I have so many, many cereal boxes in my craft room that I wanted to use some of those. The next thing I have a lot of is empty spools that vinyl comes on. I cut down a vinyl spool to about 2½ inches; paper flying, glue flying, ribbon cutting, dust flying, and Voilà I have an up cycled box! LOL My daughter needed a small box to put her daily rings and necklaces in when she is sleeping, so this is my solution.

The cute little music box image is from The Stamping Boutique. It was free for signing up for their newsletter. There is a free stamp in every newsletter, so be sure to sign up for the newsletter on the blog.You don't want to miss another issue.

I just took my vinyl spool and cut it down from about 12 inches to 2½. I then I used my MTC assisted Cricut to cut out cereal boxes at 4 inches in the cute scalloped circle pattern. I covered everything inside and out with decorative paper, added some ribbon and finally the digital stamp.
Related Posts with Thumbnails