Search DtsArt Blog

click to visit www.dtsart.com
Showing posts with label DtsArt paper designs. Show all posts

Wednesday, September 7, 2011

DtsArt Design Team Backpack Gift bag svg & back to school digital stamp


Hi Dandi Crafters...AND we're back! The DtsArt Design team is back and creating inspiring projects for your creating delight. Be sure to leave some love for the Design Team and comment. On Wednesday September 14 I will randomly draw one person and they will win their choice of either the backpack svg cut file or their choice of one of the digital stamps shown here today. Please be sure to leave a way of contacting you. If no email address is available another random number will be awarded the prize. Good Luck and Leave some Love. SVG Team A worked with backpack gift bag. The digital stamp team worked with a couple of back to school digital stamps.
You can purchase the Backpack Gift Back SVG Cut File, Digital Stamp Owl Be Thinking of You! and Digital Stamp Student Desk and Bookbag on my website http://www.dtsart.com/. The backpack svg file includes score lines to make assembly easy as possible. The Owl Be Thinking of You Digital stamp consist of 1 owl main image and 3 sentiments that are designed to wrap around the main image and be used interchangeably. The Student Desk and Book bag Digital Stamp is actually 2 digital stamps. The backpacks in each of the chairs is differently. The first backpack is more generic so this stamp can be colored for a masculine card and a book bag that is more decorative and geared towards more feminine card.
The DtsArt Design Team:

Digital Stamps:
Jennifer
Shana
Tammylee
Tanya

SVG Team A
Carolyn
Lillie
Ruth
Tamie

SVG Team B
Nicole
Stacie
Christina
Kim
The design team really came up with some cute backpack layouts and used some super cute paper.
Tamie said: " I needed a rectangular gift box and a place for a gift card. As I was doing this project, I realized if I eliminated the side score and adjusted the top flap, I had the custom gift box. How versatile!"
 
Additional photos of my backpack:


Thursday, September 1, 2011

DtsArt Design Team Fall '11 Announced!

Hi Dandi Crafters! Summer is almost over but don't be sad because fall also means the return of the talented DtsArt Design Team! You can look for projects from our design team to start inspiring on September 7. We have a lot of returning design members along with some new friends. I hope you will make them all feel welcome.
The Fall '11 DtsArt Design Team:
Digital Stamps:
Jennifer
Shana
Tammylee
Tanya
SVG Team A
Carolyn
Lillie
Ruth
Tamie
SVG Team B
Nicole
Stacie
Christina
Kim

Tuesday, May 31, 2011

Take Out Tuesday Cute as a Cupcake Digital Papers Download May 31


Hi Dandi Crafter! Welcome to week 3 of a 4 week collect the pieces project and assemble. If you are following along then you know that you are collecting the pieces to make a happy birthday altered pull tab can project. If you just found my blog don't worry because every download can be used all by itself. This week's Take Out Tuesday is the SWEET Digital Papers that I used to decorate the soup can. You do have to provide the Campbell's chunky soup can yourself.
The zip file includes copyright, terms of use and 3 8.5x11 digital papers for you to print.

I provide Take Out Tuesday Freebies as a way to say thank you to my regulars that follow me. Take Out Tuesday downloads are only available on Tuesday and Wednesday. On Thursdays we throw out the left overs. If you do not follow me consider doing so, so you won't miss any more Take Out Tuesday Downloads.

Download: No Longer Available
Next Week: Custom sized cuts to Decorate the Can


Tuesday, April 19, 2011

Take Out Tuesday Fleurish Medallion Download April 19


Hi Dandi Crafters. Happy Take Out Tuesday to you. Today I have a fun little mat for you today. It would make a nice decorative bed for a stamp, a nice gift tag. There are lots of possibilities for this ornate little mat. In the folder along with terms of use, copyright, and measurements you will find the following formats svg, mtc, and scut created with SCAL 1 so it should work with all SCAL versions.
The mat as you see it here is 3 inches in diameter.

The zip file includes:
Fleurish Shadow Layer (shown in dark pink)
Fleurish Layer (shown in grey)

You will need a very sticky mat to cut out all the ornate detail. Take Out Tuesday is provided for my regular and followers as a thank you. It is downloadable on Tuesday and Wednesday. On Thursday we throw out the left overs. If you are not already a follower you may want to consider becoming one so you will not miss out on any more Take Out.

Download: No longer available.
Still really want the file, read about file request.

Thursday, November 18, 2010

Up Up and Away Card Ready Set Create E Magazine


Hi Dandi Crafters! This card is sure to take your thoughts Up, up and Away. How cute is this little stamp. Love the dog. It's another one of my cards for Ready Set Create E Magazine.

Supplies Used:
Paper: Pattern Paper: DtsArt Digital Scrapbook Paper.

Cricut Cartridges: Accent Essentials, scalloped square.

Digital Stamp: Designer: Soft Pencil, digital stamp name Let's Fly A Kite.

Miscellaneous: pink,yellow and orange grosgrain ribbon, clear rhinestones, DtsArt Digital Stamp Sentiment.

Wednesday, November 17, 2010

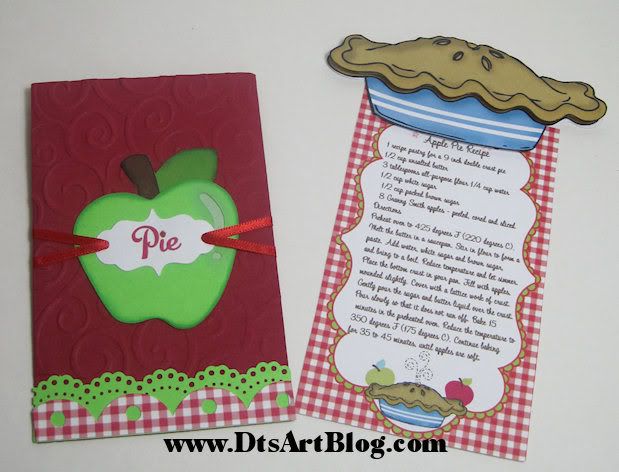
Cute Pie Recipe Card and Cover For Ready Set Create E Magazine


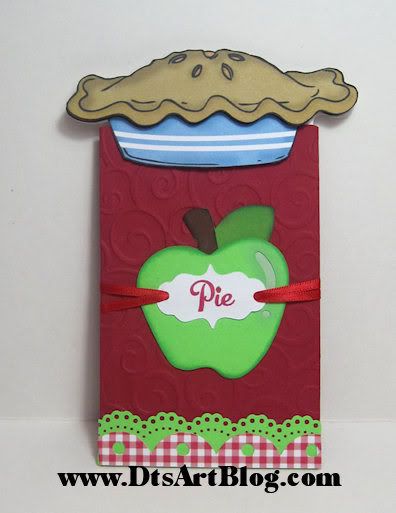
Hi Dandi Crafters! I am back with another fun creation for Ready Set Create E Magazine. With the holidays here I thought that this was a super cute idea to make use of the Pie Digital Stamp by Prairie Fairy Designs. I added the pie to the top of a cute little recipe card that I designed for this project. We all go to holiday gatherings where every year some great baker (which in my family is NOT ME! LOL) is asked repeatedly for their recipe. This is the perfect way to show it off. After I designed the recipe card, incorporating the pie digital stamp in the design, I topped it off with the cute pie stamp.

 I made a cute slip cover for the recipe card using my SCAL enabled Cricut. I used the Cricut to cut some embellishments to decorate it.Look how cute it turned out! The pie slides right over the top of the cover.

Supplies Used:

Paper: Solid Card Stock: Recollections. Recipe card design DtsArt design using Prairie Fairy Design's Pie Digital Stamp.

Cuttlebug Embossing Folders: Divine Swirl.

Cricut Cartridges: Accent Essentials: gingham scallop. Doodlecharms: Green Apple.

Digital Stamp: Designer: Prairie Fairy Designs, digital stamp name, Pie.

Miscellaneous: Martha Stewart border punch, red ribbon, SCAL for the word Pie Accent Die Cut

Tuesday, November 16, 2010

Halloween Top Note Candy Box Ready Set Create E Magazine


Hi Dandi Crafters! Here's another crafty creation for Ready Set Create E Magazine. This is a cute little witch Hershey Nugget Candy Box! This cute little candy box using top note makes such a cute little token gift. I know that Halloween has since past, however this was created for the Oct/Nov issue of Ready Set Create E Magazine.

Supplies Used:
Paper: Pattern Paper: DtsArt Digital Scrapbook Paper, Solid Card Stock: Recollections.

Cricut Cartridges: Accent Essentials, top note, Storybook, die cut and die cut accent.

Digital Stamp:
Designer: Soft Pencil, digital stamp name Little Witch.

Miscellaneous Supplies: Glitter: Martha Stewart Peridot, purple and orange grosgrain ribbon, Martha Stewart Score Board, Hershey's Nuggets, 2.5x1 inch labels.

The little nuggets covered in coordinating pattern labels is just so cute.


Monday, November 15, 2010

Dream Big Pop Up Card Ready Set Create E Magazine

Hi Dandi Crafters! This is one of my first projects I did for Ready Set Create E Magazine. It is also my first pop up card. It came out so fun! I like the colors in this card, bright and cheery but also not out of place for fall.

Supplies Used:
Paper: Pattern Paper: DtsArt Digital Scrapbook Paper, Solid Card Stock: Recollections.

Cuttlebug Embossing Folders: Divine Swirl, Spots and Dots.

Cricut Cartridges: Accent Essentials, top not and accent, Storybook, Big.

Red glitter, font Fertigo Pro for dream.

Digital Stamp:
Designer: Soft Pencil, digital stamp name Sleeping and Dreaming.


Friday, September 3, 2010

Personalized Cherry Note Memo Paper and Box


Hi Dandi Crafters! I don't know about you but I use a lot of memo notes. I recently ran out of whatever I was using before and found myself searching for paper whenever I needed to jot down a note, list, figures or what have you. I couldn't really find any tutorials on how to make the memo box so I just figured it out for myself. I decided I wanted memo paper about 4x5.5 roughly the size of an A2 card. I made up a file to cut with my SCAL enabled Cricut using Paint Shop Pro. At the end I decided, "I want to have ribbon threading", so I made an alternate pattern that had ribbon threading. It came out so fun!
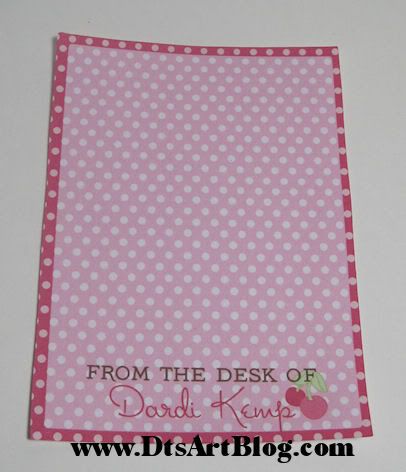
I made this sweet cherry ribbon patterned paper a few weeks ago. I love how the paper came out. It also made a super cute memo box. The pattern just fit the box design just right. I didn't want the inside of my memo box to be white and boring so I made double sided card stock using raspberry polka dots.

After I finished up the memo box I designed my memo pages. I thought the raspberry polka dots would be cute memo paper so I designed the paper and added my name to it and printed it out. I used my SCAL enabled Cricut to cut out all the memo paper. I aligned the my printed out all my pages on my printer then cut them out with SCAL using the x and y axis to align it so it cut properly. I can fit 2 sheets of memo paper to be cut on regular 8.5x11 printer paper. I will never run out of memo paper again.

Thursday, August 19, 2010

Sweet Strawberry Matchbook Notebook


Hi Dandi Crafters! The other week I shared with you my cute little strawberry SVG download on Take Out Tuesday. (Did you miss it? If you did there is still a chance you can get it. Go to this post here and tell me which you would like for the 200 followers celebration.) I thought the little strawberry that I made for demonstration was so cute that I should do something with it.

School is right around the corner, and it always seems I need paper to write notes on for various reasons, taking someone's email address, phone number, or giving them mine. I always seem to be digging in my purse for paper in the hall ways of the school when dropping my kids off. LOL I decided to be proactive this time and I made myself this cute little matchbook notepad. How CUTE!! is it!!?!! I know it is too cute! It is about 4.25 inches wide and 4 inches tall. It is the perfect size for scrap paper that I always seem to be digging for.
The whole purpose of this project was to use the strawberry SVG die cut. I thought, "Hey. I will break out the strawberry paper that I designed too". Since the inside is visible I didn't want to leave it plain so I made double sided card stock by adding some polka dots in the mix.
I know there is all the excitement and the hype of the Cricut Imagine right now, and I too am excited to get one; however, hybrid print and cut projects are an option with your Cricut already if you have it enabled with a program like SCAL or Make The Cut. You just have to know that the x and y axis that the programs show you are your friend. They allow you line up your printing with your cutting.
Anyway I made up the cute little paper in paint shop pro, printed it off and cut it out. I don't have a Bind it all or Cinch. DARN IT! so I am left with the option of staples or notepad glue. I decide to go with staples this time. LOL I printed about 50 little note pad paper. I cut them out using my SCAL enabled Cricut 4 at a time. Since the point of this little matchbook notebook was to have scrapbook paper I wanted to be sure I could tear out the pages easily to be able to give them away. So I used my handy dandi little perforater by EK Success Cutterpede. I will tell you, I don't use the perforater very much at all in projects however when I need perforation there is NO REPLACING it. LOL After perforating the pages I just got my heavy duty stapler out and just stapled the pages into my little matchbook. The pages tear out, it is functional, and cute. What more could I ask for.

I finished decorating the front by glittering a smaller strawberry svg. I also used the Cricut Storybook Cartridge and cut out the word Sweet for the front finished up the look with some ribbon and a Martha Stewart Border Punch.

Blogging Out Loud Re: 200 Followers Celebration Input


Hi Dandi Crafters! It looks like I am closing in on 200 followers. 100 followers kind of snuck up on me and I can't say that I was all that prepared for it. So I have been thinking about 200 followers and what to do. So I am blogging out loud in hopes that you my followers will give me some input on what you would like for the 200 Celebration. You let me know what you think. Here are some thoughts:

1. Make ALL previous Tuesdays Take Outs available for download for a week so everyone can catch up on the ones they might have missed.

2. Give away a Blog Make Over

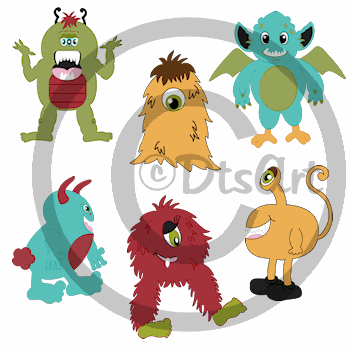
3. Give away 5 complete sets of my never released monster SVG's

4. Give away 5 blog grab button designs

5. Give away to 5 followers 12 digital scrapbook paper files so they can print them whenever they want.

6. Do a general scrapbook RAK, of scrapbook stuff, that I mail.

Here is the sample of the monsters.


Wednesday, August 4, 2010

MyGrafico Challenge No # 60 Wild Flower Stamps: Distress Vintage Mini Notebook

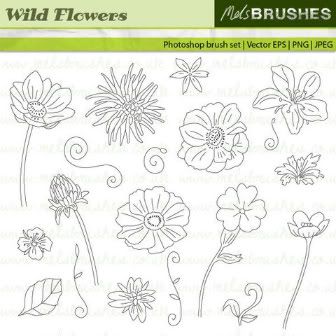
Hi Dandi Crafters, today's challenge over at MyGrafico is to make a distressed vintage project. The stamps that we used to inspire us are called Wild Flower Stamps by Mel's Brushes. Be sure to head over to the MyGrafico Challenge Blog and see what the whole creative design team came up with and enter your own project.
As for me....well this project is one of the reasons I like being on a design team! Vintage and distressed is just not something I would ever tackle without a good reason. I would have avoided this challenge had I not been on the design team. LOL! Like most people I tend to stick with the styles I do well that I am comfortable with and vintage distressed is not one of them. I admire, even love, projects with this look but it is not my strong suit.
The whole time I was working on this project I kept saying, "Oh My! This just isn't going to work out." I get like that sometimes when I am drawing too. Sometimes you have to complete the journey for it all to come together and make sense, if I  didn't know this from my experience drawing, I would have scrapped this project before it even got going....LOL
Overall I have to say I was extremely happy with the way my mini notebook turned out.
What I did was was, wash my hands because I had about 3 pieces of Hershey's Nugget Candies while contemplating. LOL I find that chocolate calms me when I am about to embark on unfamiliar territory in the craft room. LOL
I printed out about 6 flowers on white card stock. I cut them out and cut all but 1 apart. I then proceeded to crumple them up, put them through the crimper a few times and then smoothed them. Next I took out some Martha Stewart pigment ink pads in yellow, orange, pink and red and proceeded to bounce these inks all over all the flowers and pedals. After that I used some cuttlebug dry embossing folders to add texture. Finally I added more pigment ink to bring out the embossing. I then glued the various pieces onto the full flower after curling them all with a pencil. I used my crop a dile and punched a hole in the middle of the flower and on the cover and secured using an eyelet. I used a brad to decorate the center.
To make the cover I used white card stock and bounced pigment inks all over it and then dry embossed and smeared on more pigment inks to bring out the embossing. I then used my crop o dile to punch holes along the left side and slit each punched whole in the middle so it would fit over the wires. I wanted the word Notes to look the same but not get lost in the background. So I printed some brown grunge paper I made on my computer on beige card stock. I then took pigment inks to each letter after cutting. The font fit perfectly with this theme and is called Big Top. I then added ribbon in various colors and cropped each diagonally. Then being a former bow chick, I heat sealed the ribbon so it wouldn't fray.
Related Posts with Thumbnails