Search DtsArt Blog

click to visit www.dtsart.com
Showing posts with label character. Show all posts

Thursday, July 29, 2010

Corner Bookmark Tutorial using DtsArt Bookmark Loopy Frame

Hi Dandi Crafters! Today I am going to show you another way to use the DtsArt Bookmark Loopy Frame that was offered on Take Out Tuesday Download on July 27. We are going to make a Corner Bookmark with it. Both SVG and Sure Cuts Alot SCUT file are in the folder so you can use whatever cutting program you are comfortable with to cut the frame.
You may want to read through this tutorial first in case you want to do some of the extra steps that I took to embellishments my corner bookmark. For this project we need to gather the following supplies.
•Ruler
•Bone Folder
•Exacto Knife OR Scissors will work the same
•Glue Stick or ATG gun or other adhesive
•Loopy Frames Download the file if you haven't already. We will be using the DtsArt Bookmark Loopy Frame.
• Card Stock Or Paper. It doesn't matter which. I like card stock.
• Little Embellishment such as, ribbon, flowers, glitter, Cricut cuts or any other small die cut you want to use to dress up your bookmark to make it pop.
Have you gathered all that? Great then! Let's get started.

1. You need to open the DtsArt Bookmark Loopy Frame File to 5.65 inches width and height and cut it out using your cutting machine.
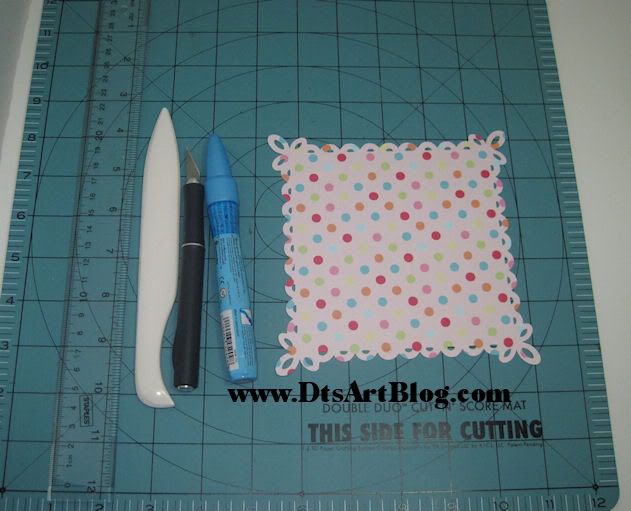


2. Take your bone folder and ruler and score diagonally from corner to corner. Repeat with the remaining corners.
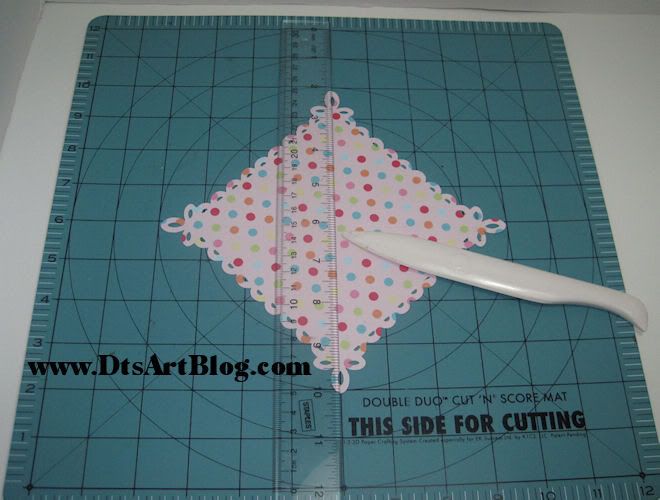


3. Fold on both score lines.
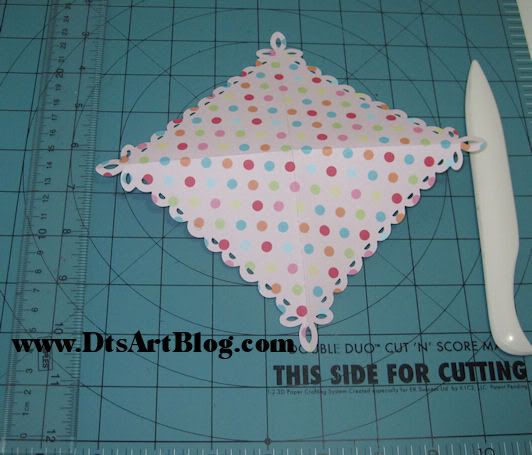


4. Notice how when folded the paper looks like it is divided into four scored triangles. Take your Exacto Knife or Scissors and cut out one of the triangles by following the score lines.
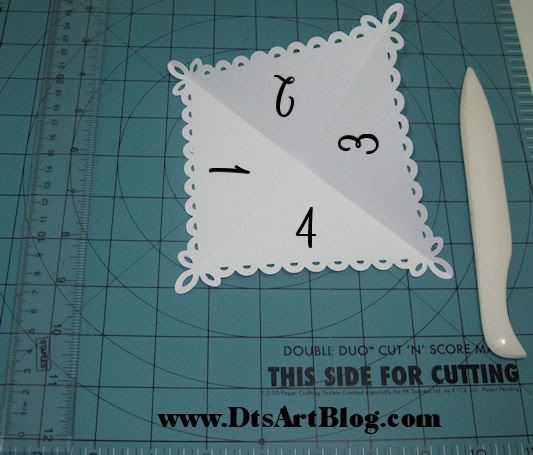


5. We  have cut the corner loops at the bottom in half. Take your Exacto Knife or Scissors and cut the other half of the loop off.
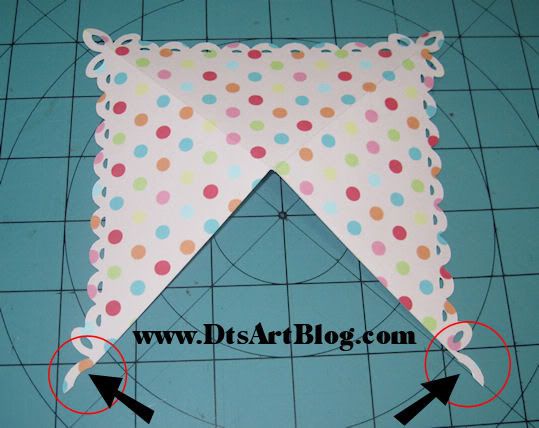
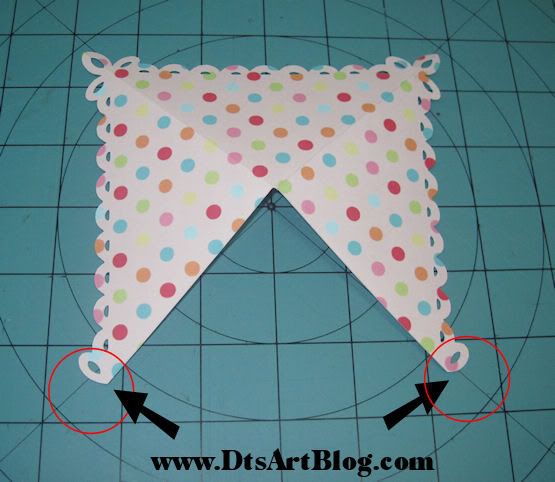


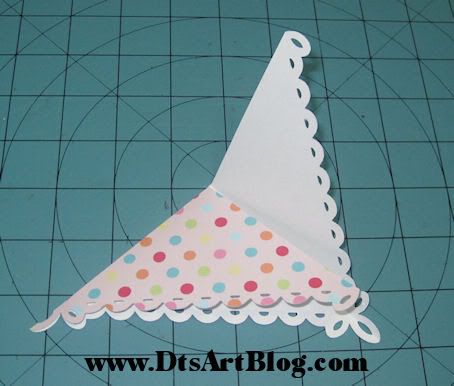
6. What we have remaining is the bases of our corner bookmark. We are now going to fold it.
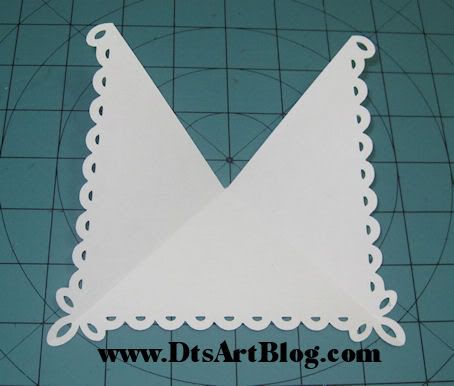
a. Fold the first flap.

b. Fold the second flap.


7. When you have a nice crease you will put glue on the inside of the second flap and close the flap. Let dry.  Be sure NOT to glue that first flap down or else you will not be able to put your book pages in the book mark!
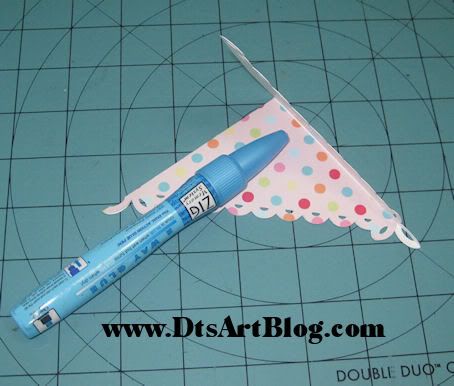
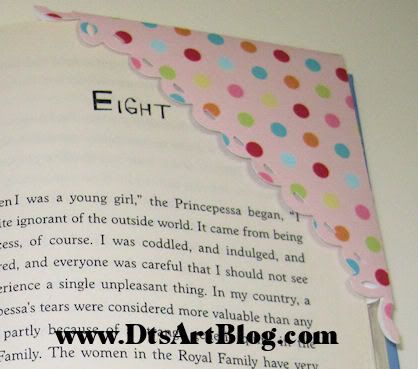
8. There you have a cute corner bookmark with sweet loopy bottom trim with very little work on our part! Now embellish the front and/ or back with your choice of scrapbook findings.
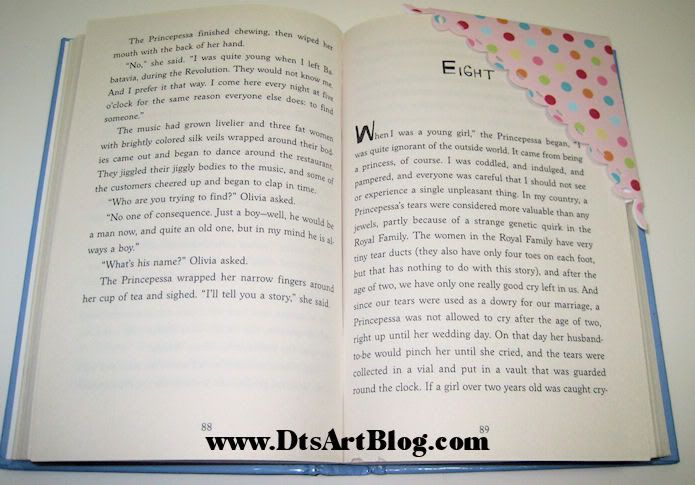
There you have it. A cute little bookmark. Perfect for summer reading. I made this one for my daughter. She is an avid reader (YEAH!!) and I make her several through out the year.
I have given the steps I took to embellish my corner book mark below in case you would like you would like to use some of the embellishment looks I have used.
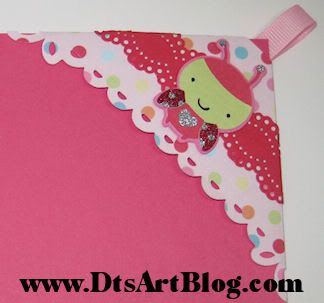
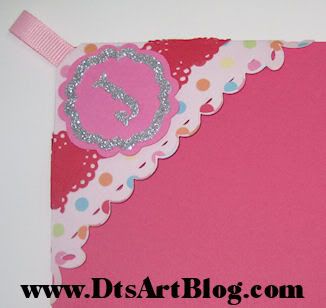
I trimmed the corner top of the bookmark so that I could put a pink 3/8 ribbon tab on it. I then cut a stripe of red card stock at 1 1/2 inches in height and about 8 inches long and used a Martha Stewart Punch on the top and bottom of it to get a doily look. I then used SUPRISE! you guessed it, Cricut's Create A Critter Cartridge for the ladybug. LOL You can find the ladybug on page 66 of the handbook. I then felt like it need some sparkle so I added silver and red glitter to the wings and heart using my glitter paste. The glitter paste how to is outlined here. I also decorated the back too. Instead of another Create A Critter animal. I KNOW I KNOW!! Can you believe what restraint I used not to include another critter. LOL hehehe I used pink card stock to make a tiny tag and then put her initial J on it with an accent cut out in silver. This corner bookmark looks good whether you are looking at the front or the back.

Thursday, February 4, 2010

Sea Friends Mermaid

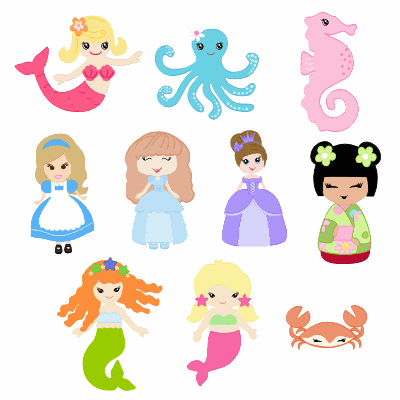
A couple of weeks ago on the MB. There was some discussion of the Once Upon A Princess Cartridge and the price. I said that I wouldn't be buying it unless the price was nice and discounted because overall the OUAP cartridge was similar to my own style of drawing and I had image similar to almost all the image they show being on the OUAP cartridge. I think it is an adorable cart but I need to show some restraint. LOL On the thread I posted a medley picture of some, yes only some, of the many little characters I have sitting on my computer. (on a side note: all images are copyrighted to ©dtsart. You may not remove, copy or otherwise use without my permission)
Well some of the posters on the thread thought they were cute and asked me if I had any in svg files. I didn't because I said on the thread. I had no idea that they would be any interest to anyone but me for cutting out. If you haven't figured it out I am new to the crafting community even though I have been crafting or tinkering as I call it for quite awhile.
Anyway, long story short I made a file of the first mermaid. As always there are svg files and scut files. The scut files were made with SCAL 1 so you can use them in SCAL 1 or 2. Also included are copyright notice and terms of use and the original dimensions. It was created about 5.5 inches wide I think it is. You will find:
  • Mermaid Base
  • Mermaid tail
  • Scales
  • shell top base layer
  • shell top top layer
  • hair base layer
  • hair top layer
  • flower base layer
  • flower top layer
You do have to draw your own face. This is the first time I have released
one of my little characters. I would love to hear comments. What you think what I could to improve, do different, what you like about how I did it, etc. The more feedback I get the more likely I will release another one. I know that as web designer that my little characters have value it does kinda make me chuckle that people want to cut them and use the. I would LOVE if you did something with them if you would show me and maybe post a link to my blog and share a bit of love.
Free Download: Sea Friends Mermaid
Related Posts with Thumbnails