Search DtsArt Blog

click to visit www.dtsart.com

Wednesday, May 12, 2010

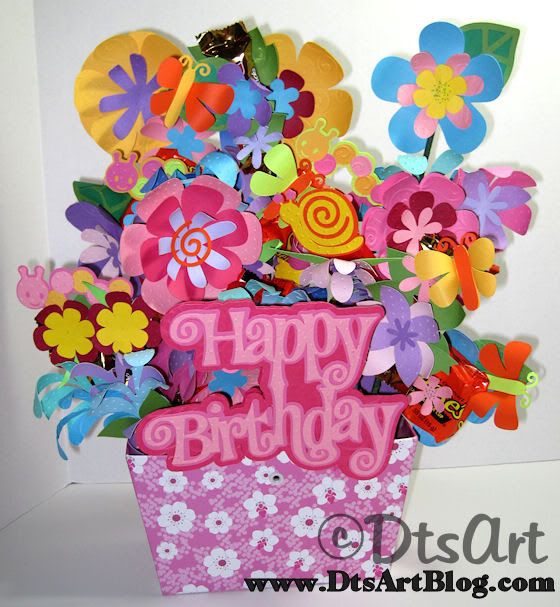
Fun Size Candy Paper Flower Bouquet Happy Birthday Arrangement

I made this for my daughter's birthday. I wanted something for the center piece and I had seen the flower bouquets everyone was doing with suckers but I she we (I am sure her brother's will help) like candy better. I decided to use Fun Size Candy Bars in my bouquet. While I was forming this center piece in my mind I popped over to the Fantabulous Cricut Challenge Blog where they were having a cricut crawl and decided to incorporate some of those ideas into my floral arrangement. They had some really nice projects using those designs. Let me tell the design team over at Fantabulous Cricut Challenge Blog which of their ideas I incorporated in my project and we will get to the how to of my fun size candy flowers after that.
The elements I incorporated are:
  • Of course, the Flower Power element featured on Cokie Pop Paper
  • Embossing on a Cricut cut elements featured on Paper Crafts by Candace
  • Die-Cut Negative element from Organized Chaos (This may not be so obvious but I used a round swirl and instead of throwing out the negative I cut a circle around it and used it as a snails shell. ;-) )
  • A swirl element because I don't have a Gypsy featured on Yonique Reflections (I put a swirl on some of the flowers one from the snail I just spoke about above. If it wasn't for these designing team ladies I think the snail would have been shell-less. LOL)
  • The shadow feature element from Light Whimsy
  • Paper piecing element from Addicted to Paper (Boy did I paper piece. LOL)
  • A Food Element Altered featured on Crafty Go Lucky (I assume candy counts as food, but don't tell my kid's I said that! LOL)
  • Thanks to all the members of the design team over at Fantabulous Cricut Challenge Blog I had lots of fun incorporating your ideas into my project.
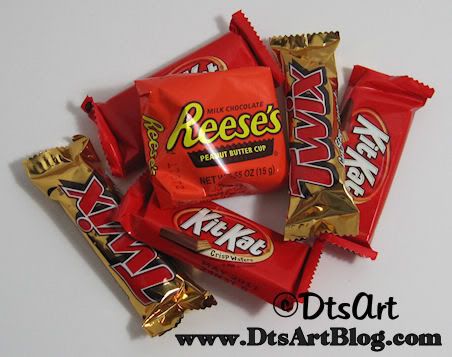
Now let's get down to how I accomplished the fun size candy flower bouquet. It wasn't really my intention to cover the fun size candy completely. I didn't mind if some of them showed but for the most part they all pretty much ended up being covered and camouflaged. You will need to have some fun size candy on hand for this project. This is what I used. My daughter is pretty picky about the kind of candy she likes.

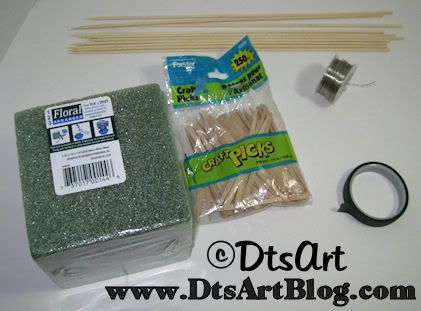
The list of supplies:
  • Fun Size Candy Bars
  • A pot or vase bottom of some sort to hold your bouquet
  • Floral Foam
  • Light weight wire (I used 24 guage)
  • green floral tape
  • Craft Picks
  • bamboo skewers
  • Terrifically Tack Tape
  • Flowers cut out in various sizes using your cricut or other cutting machine. I used about 3 or 4 different cartridges
  • A title or banner. I have a Happy Birthday SVG available to download in a previous post.
  • Some insects or birds or some kind of life cut outs using your cricut or other cutting machine.
  • Leaves cut out in various sizes using your cricut or other cutting machine.

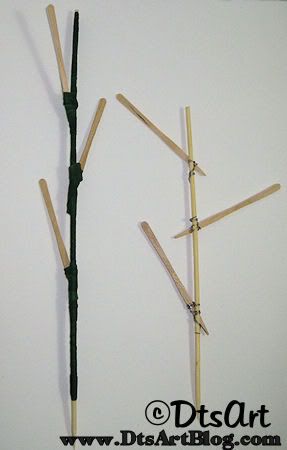
You want to take your 24 gauge wire and cut it about 5 inches long and wrap it around the bottom of a Craft Pick then you want to it around the bamboo skewers. You want to kind of point it out as if it were a leaf on a stem. You will want to add 3 or 4 craft picks to the bamboo skewers. I wouldn't advise adding more than 4 to a skewer as the candy is a bit more weighty than you think and too many candy bars on one stem can cause it want to bend and not stand up straight.
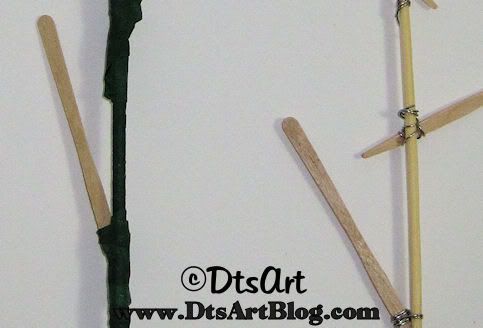
A close up.

Now you will want to wrap your craft tape around the skewer going up just enough around the craft pick to cover the wire.

Once you have the skewers covered you will want to take the fun size candy and flip it to the back. Most of the wrapper labels have little flaps that you can lift up. Take some Terriffically Tacky Tape and and run it along this flap. Now place the craft pick in between the flap and wrapper. Think of a leaf protuding out. On the Reese Cups, there is no flap. I just slide the craft picks through the back of the wrapper. The craft picks will poke out the top of the Reese Cups but you can just cover the the part that sticks out with a bug, flower or something.

Once you have all your candy branches added to the stem you want to start taping your flowers and leaves onto the candy bars to cover them. When you are done covering all the candy with flowers put the flowers stems into the floral craft foam and arrange them to look cute. After all the flowers are planted into the foam add the insects. That is is your done with your fun size candy flower bouquet. Now you can start picking your flowers and eating them. YUM!


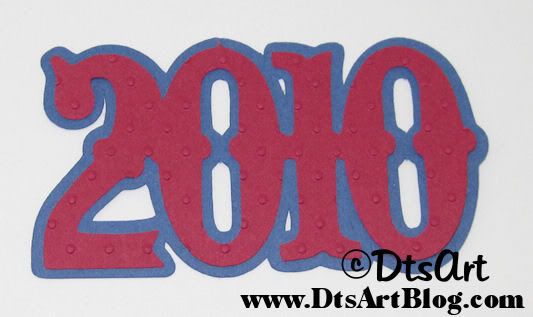
2010 SVG Cut File to Download

Here is a 2010 svg cut file that is welded together. This was a request. If you have come here from a third party site that collects and post free svg to download I would appreciate if you would take the time to comment. It makes me more inclined to put up freebies when people take time to say some nice words. I see that many people come here from those type of sites to download. Although I am happy to share I would be happier if you took the time to comment.
The file holds 2 svg filesa base and title. Also included are copyright notice and terms of use and the original dimensions.
The zip file includes:
•A base 2010(shown in blue)
•A 2010 (shown in red)
Download: 2010 Welded File

Saturday, May 8, 2010

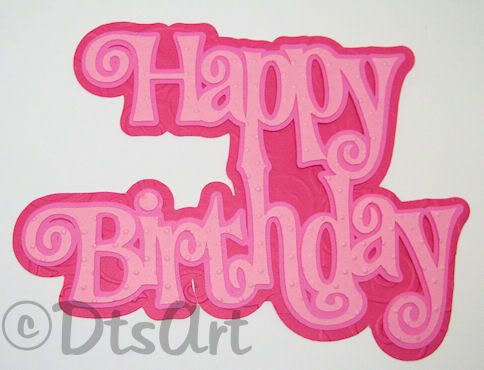
Happy Birthday SVG File to Download

My daughter is having a birthday soon and I of course needed a Happy Birthday title for a project I am working on. (Come back soon to see the completed project. It is too cute. You won't want to miss it.) So I played around a bit and this is how it came out. It conveys, "let's celebrate your birthday" PERFECTLY, at least I think it does; if it doesn't don't tell me LOL. I thought I would make it available for download. I made mine in pink but I think it would work equally well in blues for a boy, or primary colors for those turning 30,40,50,etc. The Happy Birthday was created and cut at about 5 inches of course you can size it to your needs. I also used Cuttlebug folders to emboss the light pink Happy Birthday and the dark pink Happy Birthday blackout shadow. The file holds both svg files and scut files. The scut files were made with SCAL 1 so you can use them in SCAL 1 or 2. Also included are copyright notice and terms of use and the original dimensions.
The zip file includes:
  • A base Happy Birthday (shown in medium pink)
  • A Happy Birthday Title (shown in light pink)
I did not include the large shadow file(shown in dark pink) because all that it is the base Happy Birthday on Blackout Shadow on 3 in SCAL. I think you can make that yourself and you may not want your shadow that fat so that is why I did not include that in the zip file. If you would like other celebration phrases or words in this style let me know and I will see what I can come up with for you. If you do something with the file I would love to see it drop me a link to it or something.
Download: Curly Fun Happy Birthday Title

Friday, May 7, 2010

A Sunny Teacher Appreciation Gift

Today's teacher appreciation gift had a theme of  "Think Summer". With that in mind, I remembered that the Hello Kitty Greetings Cricut Cartridge had a cheerful little sun on it that I could work with. I took 2 toilet paper rolls covered them with yellow vinyl, although I am sure card stock would work too. I cut 2 circles at 1.660 inches in heavy card stock covered in vinyl to make a bottom for each toilet paper holder. I used vinyl to cover the toilet paper rolls because it was already sticky so I could save a step. I cut 2 orange suns on heavy card stock at 6 inches using the blackout feature. I cut out 2 yellow suns on heavy card stock at 5 3/4 inches using the clothes feature. After cutting all the pieces I embossed them with cuttlebug folders. I used 4 pieces of terrifically tacky tape to adhere the orange card stock to each side. I printed and cut out 2 little thank you notes from an svg file I had and put them on either side of a craft pick and put the pick inside one of the toilet paper rolls. I used some terrifically tacky tape to adhere it to the inside. Both sides look exactly the same so there is no front or back. I then filled the tubes with Fun Size Kit Kats and Twix. I got this quick and fun idea from LightWhimsy, while blog hopping, who did a classic apple.
Related Posts with Thumbnails